Table of Contents
Plotting Normal Data
Before starting:
Please complete the Report Builder Tutorial
This tutorial uses the same sample files used in the report tutorial, but you can download the files here.
To begin the tutorial, open the CreatingReport_Tutorial.cmo.
On page 2 of the report, knee flexion is being graphed. Instructions for creating this graph are in the Report Builder Tutorial.
The NormalData.vnd is the average data file.
The CreatingReport_Tutorial_withNormalData.cmo is the completed cmo file with the plotted normal data.
Plotting Normative Data
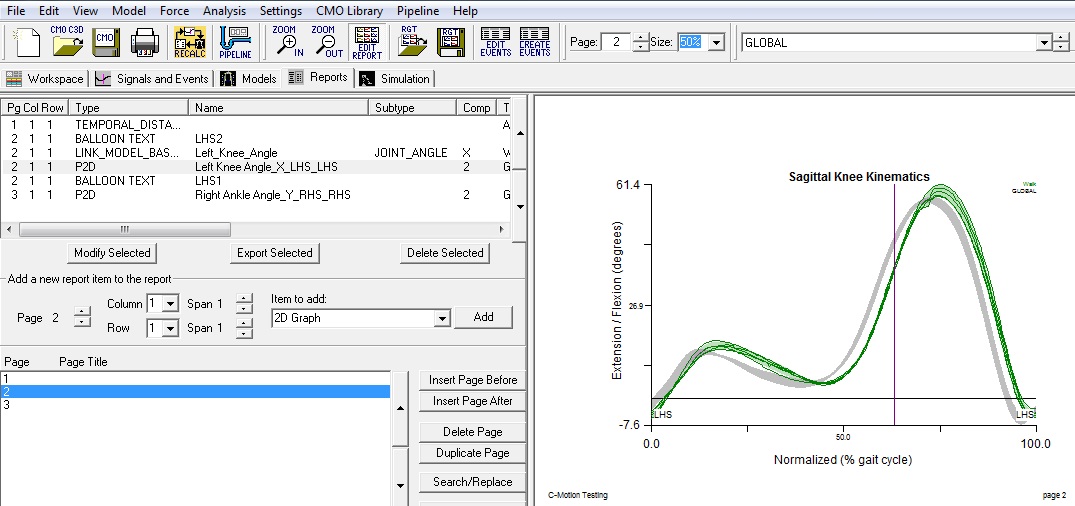
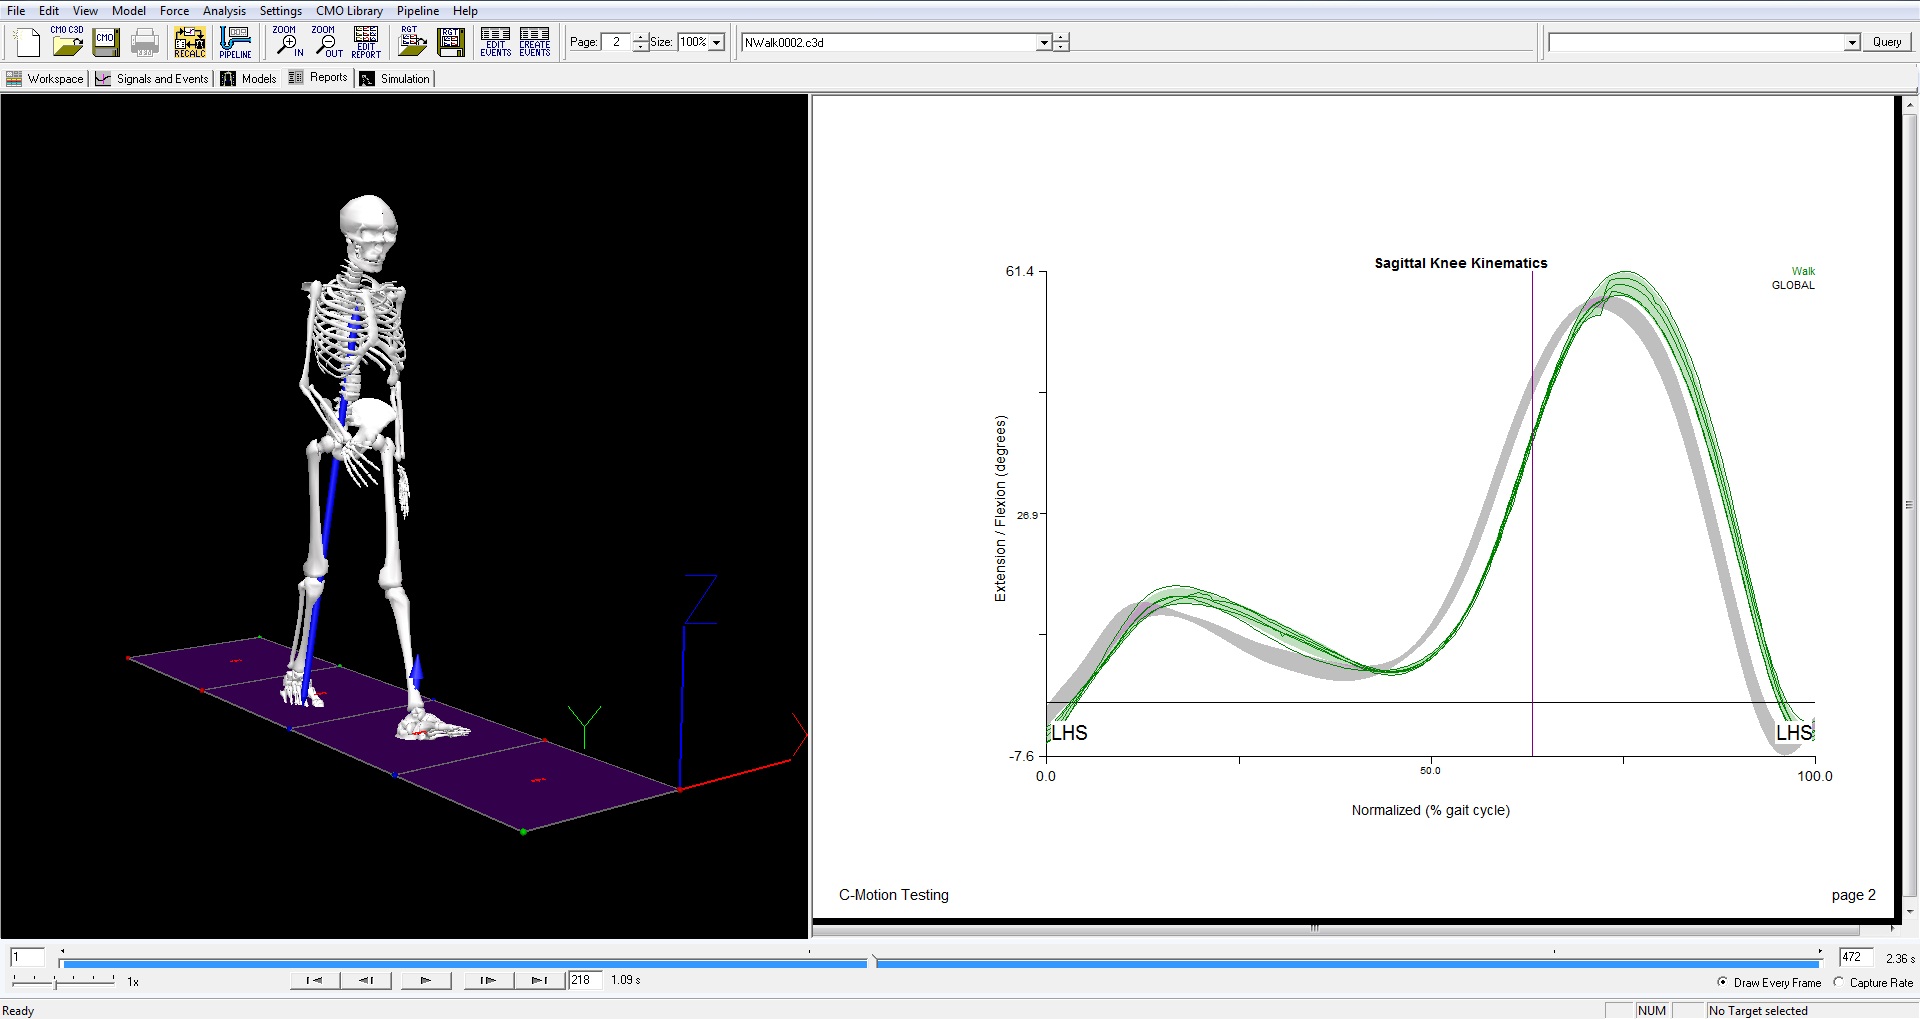
This tutorial describes how to graph normative data. The gray band on the report below shows the average knee flexion for several subjects. Before graphing normative data, the normal database file must be created using the CMO Library. For more information about creating a normal data base file see the Normative Data From CMO Library instructions.
For more information about graphing signals, please see the Report Builder Tutorial.
Load Normative Data
Load the normative data into the workspace:
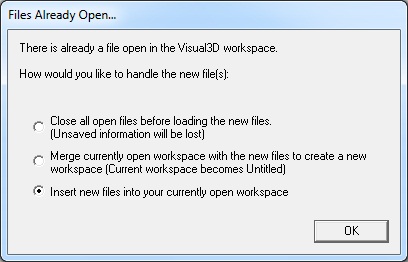
| 3. In the Open Motion Trials dialog window: 1. Set the data type is set to Normal Data 2. Select NormalData.vnd 3. Click Open NOTE: Normal data can be saved as .vnd, .p2d, or .avg files. | 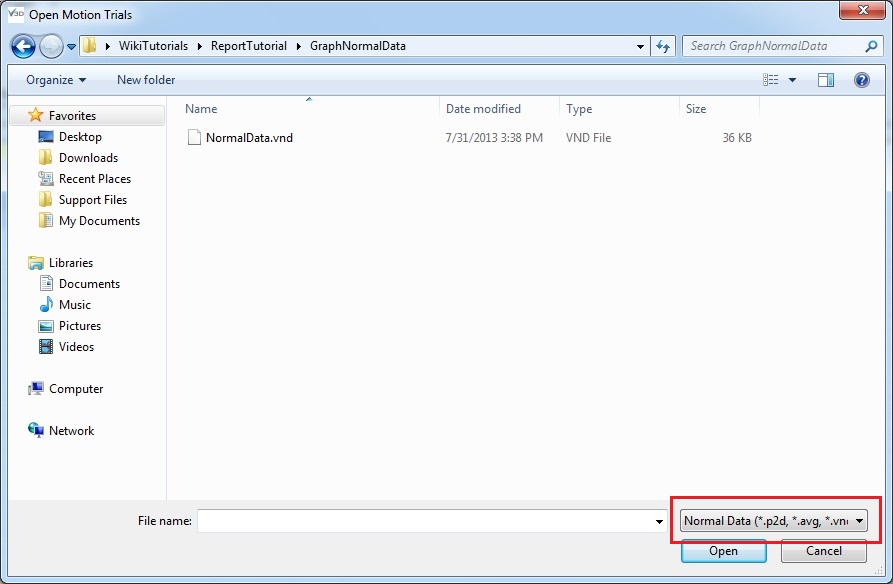 |
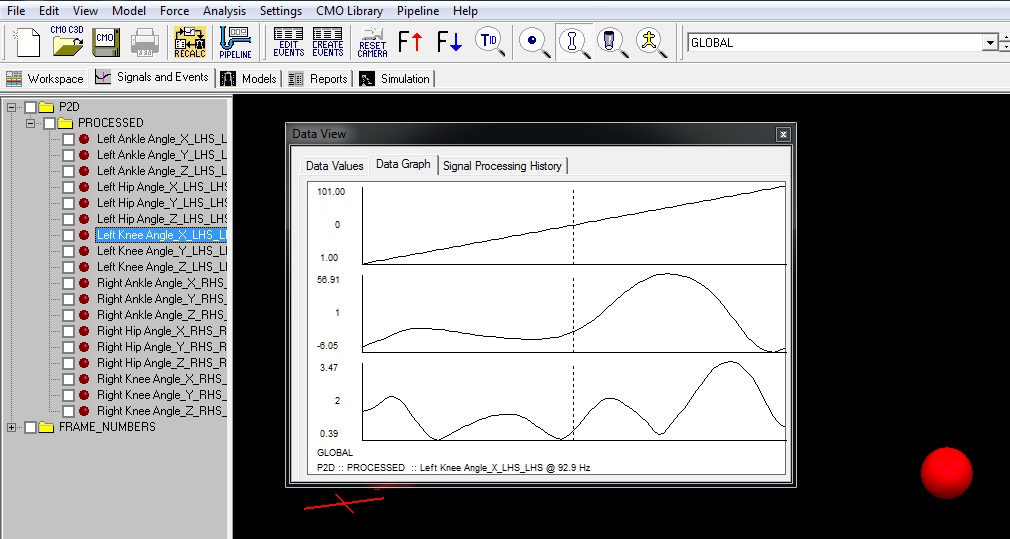
| The normal data file should now be loaded into the workspace. To see the normal data: 1. Set the Active File to GLOBAL 2. Expand the P2D folder 3. Expand the PROCESSED folder 4. Select the Left Knee Angle_X_LHS_LHS signal 5. In the Data View dialog box: Component 1 is the number of points the data was normalized to when exported Component 2 is the average value Component 3 is the standard deviation |
Graph Normative Data
In the Report Tab:
| 1. Select the graph you would like to add normative data to by clicking on it once. 2. Set Item to add: to 2D Graph Click Add | 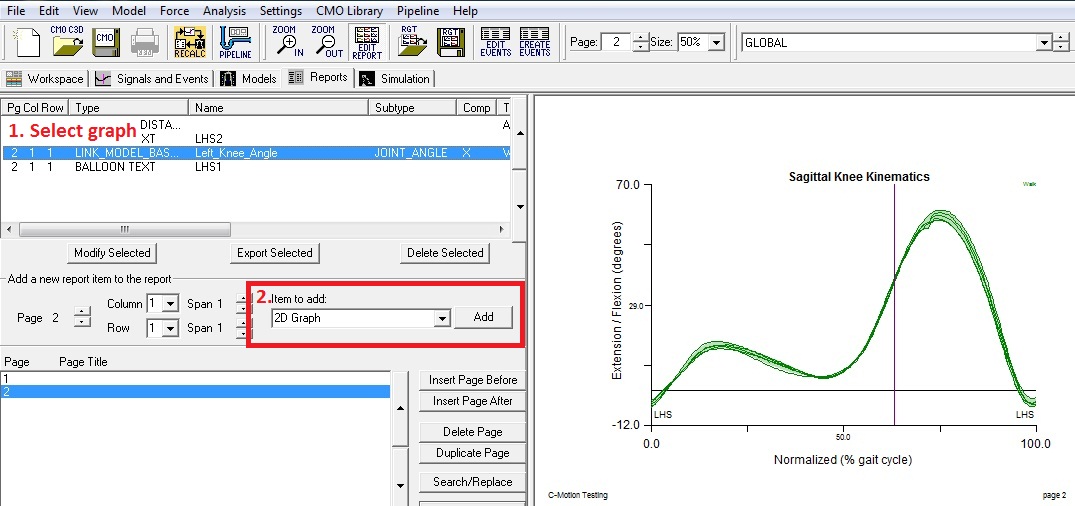 |
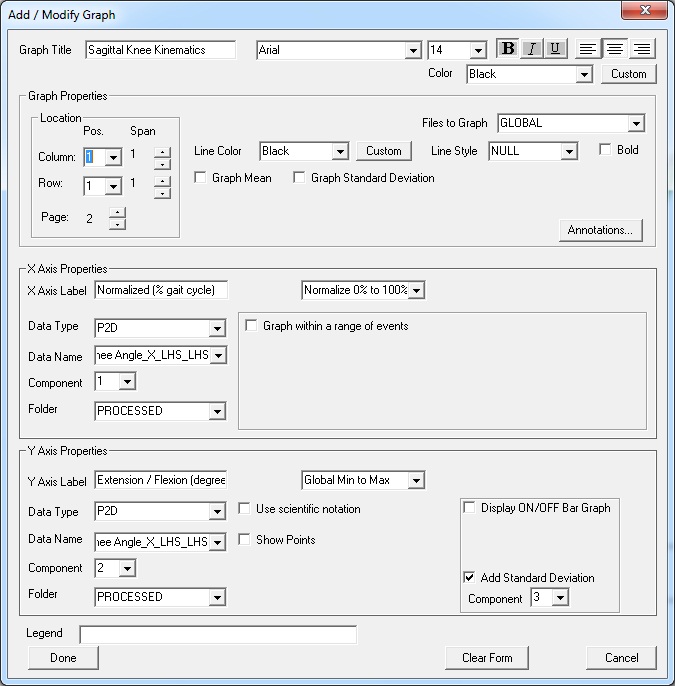
| 3. In the Add / Modify Graph dialog box enter the following parameters: (See the image below to view the dialog box) | Graph Properties: Files to Graph: GLOBAL Line Color: Black Line Style: NULL DO NOT check Graph Mean or Graph Standard Deviation, The normal data will not graph if these are checked. | X Axis Properties Properties X Axis Label: Normalized (% gait cycle) Data Type: P2D Data Name: Left Knee Angle_X_LHS_LHS Component: 1 Folder: PROCESSED Select: Normalize 0% to 100% DO NOT check Graph within a range of events. The normative data was normalized when exported from the CMO Library. | Y Axis Properties Properties: Y Axis Label: Extension / Flexion (degrees) Data Type: P2D Data Name:Left Knee Angle_X_LHS_LHS Component: 2 Folder: FOLDER Check Add Standard Deviation Component: 3 | Click Done |
