Table of Contents
Jig
(Work In Progress)
Collecting
In order to use the CalTesterPlus program you need a set of trials that meet certain requirements. Trials for the Template mode do not need to have the CalTester Rod in them (though the presence of the rod will not prevent the program from being able to use the trial). The trial does however need to have at least 3 template markers present.
Sample Files
Each example motion trial found that is downloaded with the CalTesterPlus program found in the TutorialFiles folder meet the above criteria.
The sample files can be found on your C drive under the folder Program Files, sub-folder C-Motion, sub-folder CalTesterPlus, sub-folder Samples, sub-folder Tutorial files. The condensed file path is shown below.
C:\Program Files\C-Motion\CalTesterPlus\Samples\TutorialFiles
“TrialBack1.c3d” will be used for this tutorial.
Template Trials
- Set up your capture volume making sure that all force platforms and cameras are in the positions that they will remain in for following data collections.
- Make sure that a Template with at least 3 markers is correctly positioned relative to the force platforms.
- The trial needs to be at least 1 second long.
- Each force platform needs a separate Template where the template is defined in the force platform coordinate system.
Introduction
This process calculates the location of the force platforms based on the location of the Template in the C3D trial using the Template file created earlier.
The report generated using Platform Mode can be saved as a text file (.txt) and the values can be inputted into the data collection software that you use.
Update Corners with a Template
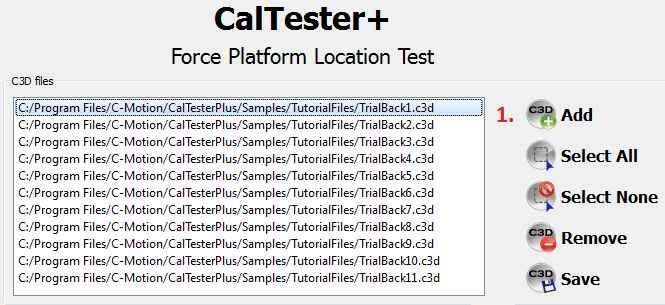
1. Use the add button at the top right-hand side of the screen to load all of the .c3d file that you want to use to create a report from, and select it by highlighting it. For the sample data we will be using the files “TrialBack1.c3d”.
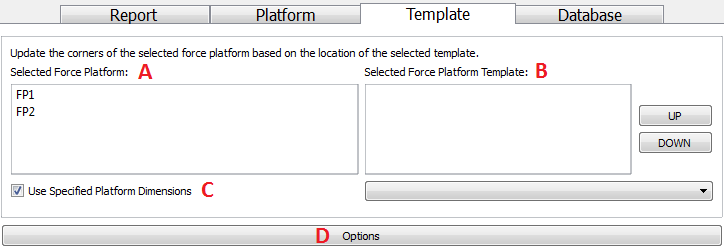
2. Make sure that you are on the Template tab (image below)
(A) Check that you have selected FP 1 if you are using the sample data if you are using your own make sure that the force platform number corresponds to the force platform number that is associated with the Template you are using and want a readout for.
(B) Select the Template that is associated with your force platform, for the sample data the template will be “FP1”. If no template has been loaded, Step 3a will explain how to load a template into the workspace.
(C) Select the Use Specified Platform Dimensions if you will input the force platform sizes into the FP Size sub-tab of the Template tab.
(D) Click on the Options button at the bottom of the screen.
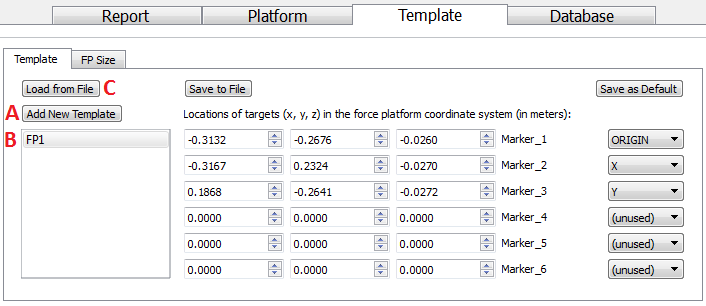
3. On the Template sub-tab: (image below)
(A) If no template is available in the list box:
Click “Add New Template”
Rename from “unknown” to “FP1”
(B) Load the locations of the Template targets in the force platform coordinate system:
Click “Load from file”
Select the Template created earlier
If following the previous tutorial the file name is “FP1_Template.txt”
(C) On the Template sub-tab make sure that the coordinates are correct for the Template that you are using. The correct coordinates for the sample data are shown below.
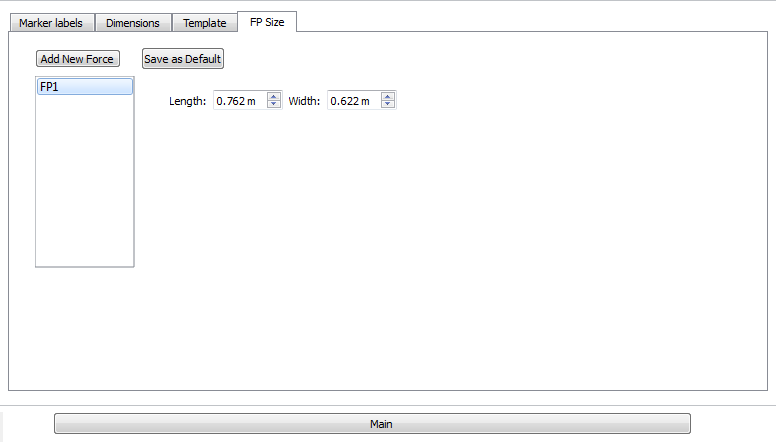
4. On the FP Size tab make sure that the force platforms sizes are correct. The correct dimensions for the sample data are shown below.
5. If the inputs for either step 3 or 4 are incorrect you should correct them by re-running the Create Template tutorial
6. Click “Main”
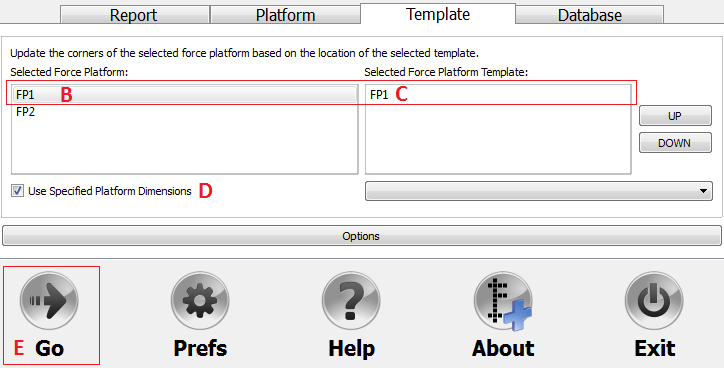
7. On the main Template tab: (image below)
(A) Ensure the correct C3D trial is selected
(B) Select the relevant FP
(C) Ensure the corresponding FP template is selected and aligned with the correct FP. If the force plate is not aligned with the correct template, use the “Up”/“Down” buttons to re-arrange the order of the templates.
(D) If using specified FP dimensions, make sure this is checked
(E) Press the Go button.
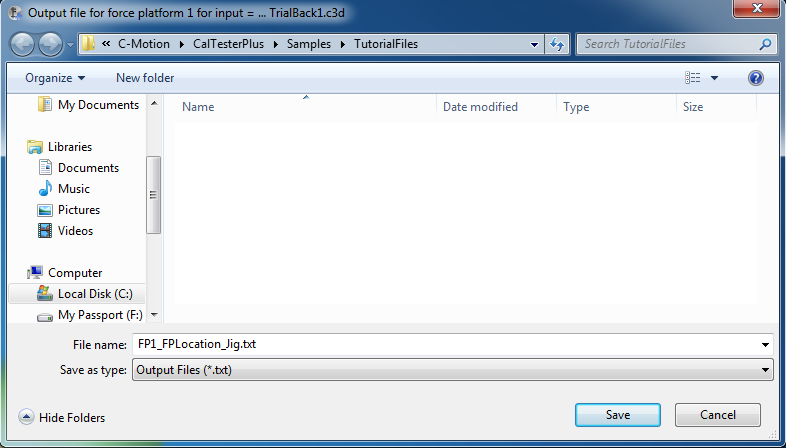
8. You will be asked where you would like to save the file and what you would like to name it. Make sure that you save the file with the extension .txt.
9. The text file that is produced will contain the location of the force platform corners in lab space and the rotation matrix of the selected force platform to the lab.
Output for force platform 1:
Corrected Locations (in mm):
Corner 1: 644.1502, 628.6795, -28.8087
Corner 2: 648.5273, 6.6968, -27.2941
Corner 3: -113.4524, 1.3383, -25.7585
Corner 4: -117.8294, 623.3210, -27.2731
Force platform Center:
265.3489, 315.0089, -27.2836
Rotation Matrix (into lab space):
-0.007037 0.999973 -0.001998
0.999972 0.007032 -0.002449
-0.002435 -0.002015 -0.999995
Cardan angles to rotate from lab to force platform
Angle 1 (x): 179.885
Angle 2 (y): -0.139515
Angle 3 (z): -89.597
Cardan angles to rotate from force platform to lab space
Angle 1 (x): 179.885
Angle 2 (y): -0.139515
Angle 3 (z): -89.597
Nexus orientation parameters:
-0.200001
-0.0195748
-89.5969

