Table of Contents
MTD3
The Mechanical Testing Device (MTD-2) is manufactured and supported by Motion Lab Systems, Inc. The MTD-2 is a precision-machined calibration-testing tool that can be assembled in less than a minute to create a calibration-testing object suitable for a number of 3D biomechanics laboratory tests. The MTD-3 rod effectively adds a load cell to the MTD-2 rod, and the rods are otherwise the same size and work equally well. The MTD-3 may replace the MTD-2 and all of the following instructions are suitable for both.
Components
The MTD-2 is comprised of the following items supplied in a plastic storage case:
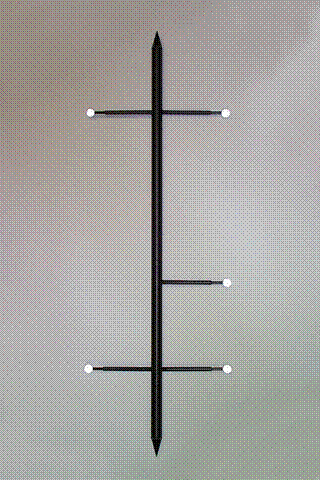
- Five (5) wands with retroreflective markers;
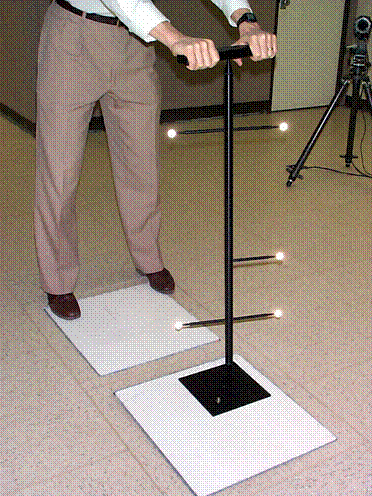
- Calibration-testing rod with two (2) conical tips test plate and handle, each of which has machined conical dimples into which the cone tips of the rod are placed.
All items, except the calibration-testing rod, are mechanically compatible with the MTD-1 design from Motion Lab Systems. The MTD-2 calibration-testing rod (at 904.64mm) is shorter than the MTD-1 and does not offer alternative marker wand mounting points. The standard configuration for use with the CalTester software uses the wands with the retroreflective marker targets attached to the calibration-testing rod in either a four or five-target configuration. It is recommended that you use the five-target configuration. The four-target arrangement is symmetrical, which can sometimes create problems when using automated labeling software.
Placing the Flat Test Plate
See Also
See the Visual3D documentation for pipeline commands related to the CalTester MTD rods:
It is also possible to use the CalTester Rod as a Digitizing Pointer.


