Connecting to Cameras
Click the 'Connect…' button (near the top left of the main Capture™ window) to connect to the cameras.
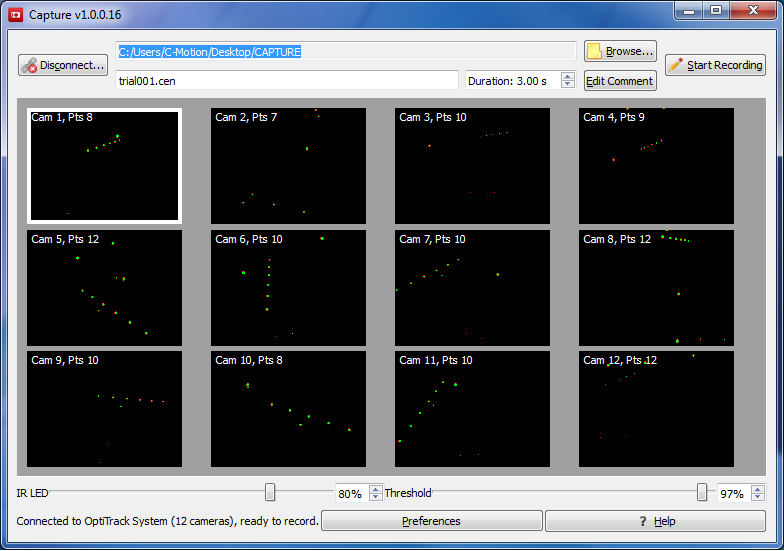
Once the system is connected, graphical camera previews will appear in the middle of the Capture window as seen the image below. Note that the Start_Recording button is now active, and the Connect button has become a Disconnect button.
Camera hardware settings (Infrared LED and threshold levels) can be modified for different lighting conditions by dragging the respective sliders near the bottom of the main Capture window. The sliders affect only the selected camera.
Double-clicking on an individual camera will zoom into the camera and hide all other camera views. Double-clicking again will zoom out and restore all camera views.
Filenames
The directory where .cen files will be recorded can be set by clicking 'Browse…'.
If Capture is launched by AMASS, Capture will use the .cen file path the user has set in AMASS.
If Capture is launch by the user manually (i.e., double-clicking the Capture icon on the Desktop), then Capture will use:
- the last directory set by the user within Capture or
- the application folder if a directory has never been selected by the user.
A separate edit box contains the name of the file. After each .cen file is captured and saved to disk the program will automatically append (or increment) a number at the end of the filename.
For example, trail.cen will changed to trail2.cen, etc.
If the .cen extension is omitted by the user, it will be added automatically to the filename.


