Table of Contents
DSX Suite Installation
The DSX Applications are not installed separately (except Visual3D), but rather are installed as components of the DSX Suite. The Suite requires an activation code in order to be used.
Hardware Requirements
The DSX Suite performs most of its compute-intensive functions using CUDA on nVidia graphics cards. Thus the graphics card is the most important computer component for DSX. The GeForce “gaming” cards work well with DSX, and the more CUDA cores the better.
The recommended minimum hardware requirements are:
- A CUDA-compatible graphics card with at least 1024 CUDA cores (NVidia 2080 Ti is good, avoid Quadro)
- A screen resolution of at least 2560×1440
- 16 GB RAM
- A 64-bit CPU with at least 4 cores
An ideal computer for running DSX would have components such as:
- Intel i7-9700K CPU
- nVidia RTX 2080 Ti graphics card
- 32 GB RAM
- SSD data drive
- 34“ - 40” 4K monitor (3840×2160)
Software Requirements
The DSX Suite can be operated on computers running Windows 10. At this time the DSX Suite is not compiled for operating systems other than Windows. The DSX Suite is designed to run on 64 bit computers.
Downloading the DSX Suite
HAS-Motion software is all downloaded over the Internet. Customers are provided login information to access the download page. After you log in, click the DOWNLOAD button to save the DSX Suite installation file to your computer.
- Most web browsers will offer you a choice of where to save the downloaded file; make sure you remember where you save the downloaded file.
- Run the installation executable file you downloaded.
- We recommend saving at least one prior installation file of the DSX Suite that works for you, as older installation files may be removed from the HAS-Motion download page without notification.
Installing the DSX Suite
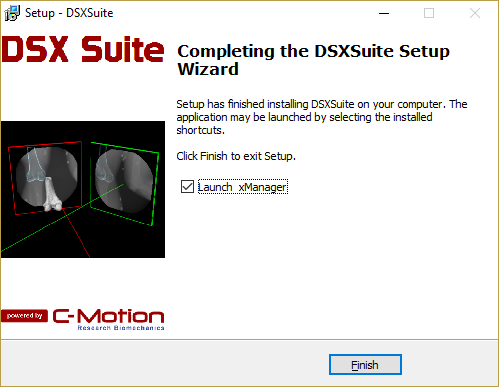
Dialog notifying of a successfully completed installation.
- When you run the executable file that you downloaded you will be guided though the following steps.
- Your computer may ask you to confirm that you trust the source of the program you are installing.
- When the completed dialog appears the DSX Suite has been successfully installed on your computer.
- If you leave the checkbox selected xManager will be opened automatically, after you click the Finish button.
- All DSX programs store various variables (e.g., color theme, last loaded subject file, mainwindow layout) in the computer's registry. Each subsequent installation inherits these variables from the previous installation. When this is undesired, the customer can perform a reinstall in which case the installer gives an additional option at the end of the installation to clear the registry.
Licensing
All applications in DSX Suite can be activated with one suite license key. The instructions for activating are listed below; once the suite is activated you will not need to repeat these steps again unless the suite is deactivated.
- A license key you purchase can only be used on one computer at a time.
If you wish to use the license key on another computer you will need to deactivate the DSX suite on the computer that the license key is being used on (instructions are below.) You can then use that key to activate the DSX suite on another computer.
Activation
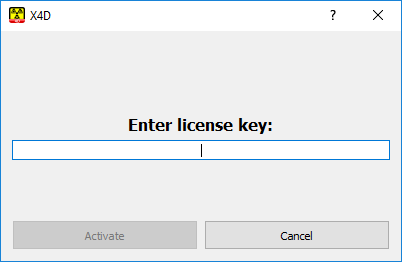
If one of the DSX applications has not been activated then when you try and open it for the first time - either by clicking on its link at the bottom of xManager or by clicking on the application desktop shortcut - you will presented with the Activation dialog. You will be asked to enter your license key into the text field. It is a string of four sets of four numbers (ie. #### - #### - #### - ####) which is normally e-mailed to you when you initially purchase the DSX applications. The number can also be found on your customer account through the HAS-Motion website. If you press the Cancel button the DSX application will close without being activated.
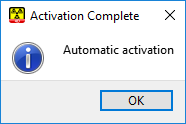
When you press Activate on the above dialog box the “Activation Complete” notice should appear.
NOTE: If you are not connected to the Internet the first time you start the program, you will get a message with key system information. You can manually activate a license from the downloads web page (from the list of activated systems section), or you may copy the entire message in the dialog box and e-mail it to support@has-motion.ca.
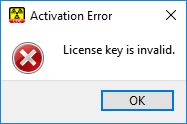
If you receive the “Activation Error” notice, please verify that you have entered the license key correctly. If the problem persists contact support@has-motion.ca for further assistance.
NOTE 2: If you receive the “Previously Activated User” notice then the license is already in use and you will either have to deactivate it on another computer or purchase an additional license.
Deactivation
In order for a DSX application license to be used on another computer it must first be deactivated on the computer it is being used on.
- From the drop down menu select the About button at the bottom.
- In the About dialog click on the Deactivate button at the bottom right.
Uninstalling or Moving the DSX Suite
If you want to completely move DSX to another computer, just to remove the DSX Suite from your computer, you will need to first free up the license and then uninstall it.
- Deactivate the DSX license(s) to free it up for future use - see above.
- Close all DSX applications completely.
- Use the standard Windows tools for uninstalling software.
- In Win10 this is under the Settings and Apps menu. For previous versions of Windows, use the Control Panel section for Programs and Features.
Using Windows Remote Desktop
With the exception of xManager, all application in the DSX Suite dependent on OpenGL 2. To enable these applications to work remotely, NVidia has created a special tool for GeForce GPUs to accelerate Windows Remote Desktop streaming.
NVidia GeForce Experience
Since version 3.20.3.63(?), the GeForce Experience app has dedicated the Alt-Z shortcut for its in-game overlay. When this shortcut interferes with any of the DSX programs, you'll have two options:
- Disable the in-game overlay entirely, by deselecting it in the settings menu (accessed through the gear symbol) of the GeForce Experience app.
- Choosing a different shortcut, by going to the keyboard shortcuts menu of the in-game overlay settings. This settings menu can be accessed by pressing on the 'Settings' button under 'In-game overlay' in the settings menu (accessed through the gear symbol) of the GeForce Experience app or by pressing on the gear symbol when the 'in-game overlay' is active.


