Table of Contents
Getting Started
(Work in Progress)
Tutorials
Starting to use IORgait
When you first start using IORgait there are some steps that you will need to take in order to get the program set up.
1. After purchasing IORgait you must install it on the computer or computers it will be used on. Detailed instructions on how to install IORgait can be found here.
2. The first time you go to use the program after it has been installed you will need to activate it. Detailed instructions on how to activate IORgait can be found here.
3. Once the program has been activated you will be taken to the login screen. At this point the user is the “admin” account which has the authority to make changes to permissions and create new users. The default password for the “admin” account is “admin”.
4. After logging in as the administrator navigate to the user's screen.
5. Change the admin account's password using the Password button at the bottom left hand of the screen so that only authorized personnel may access the administrator's account. 
6. At this point you may wish to create other Users or Start a Subject Session.
Setting Up User Accounts
In the likely event that there is more than one person using the IORgait program you will want to set up additional accounts.
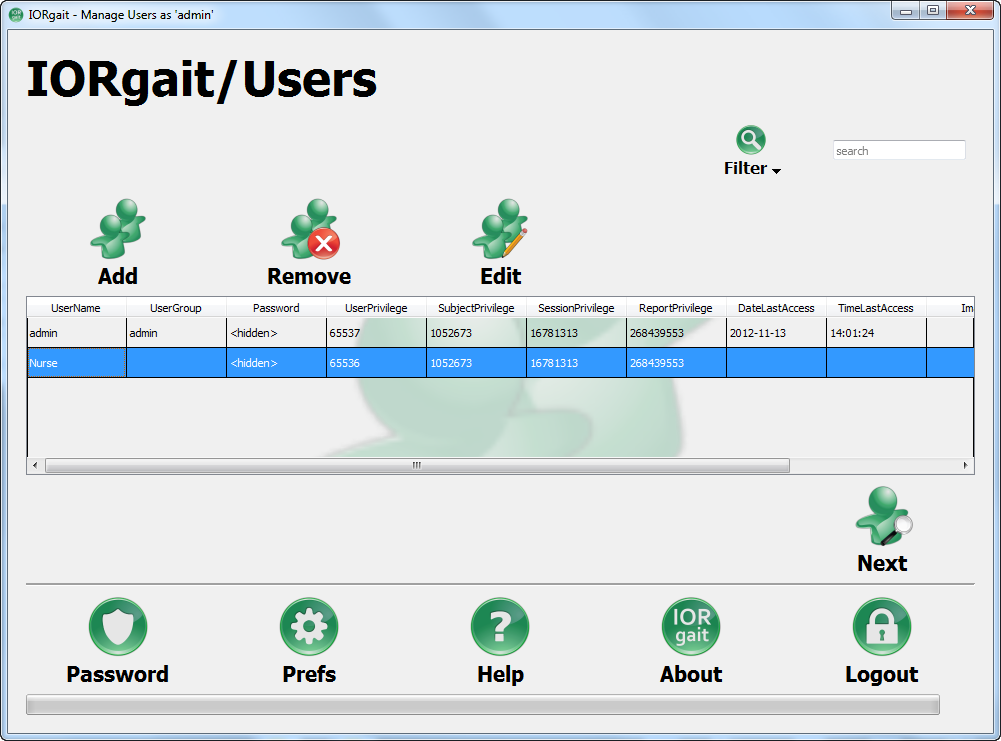
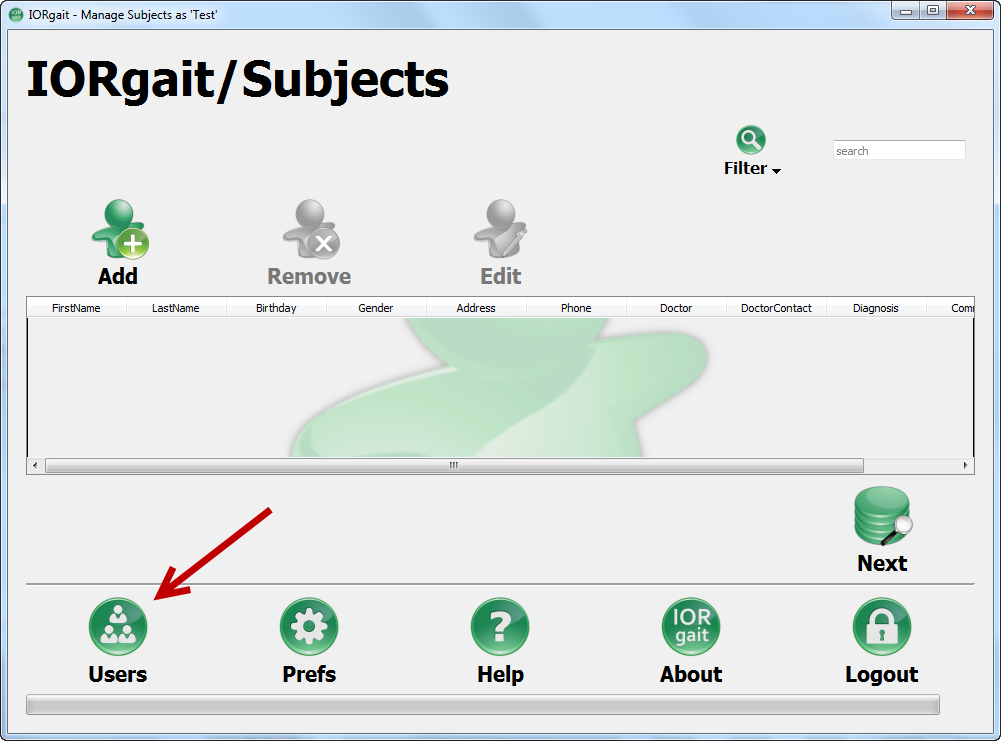
1. Login as the administrator and navigate to the User screen by clicking on the User button at the bottom left hand side of the screen.

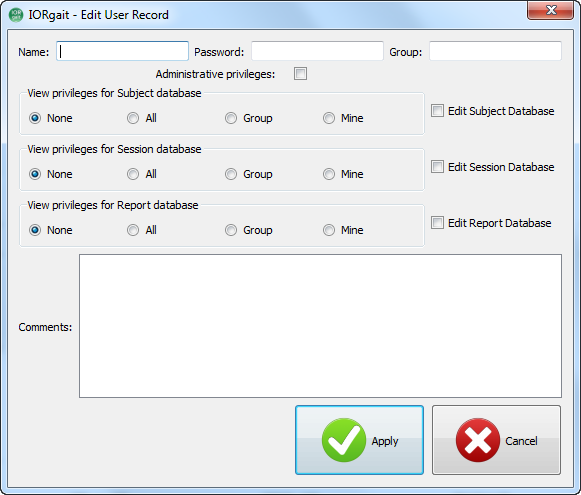
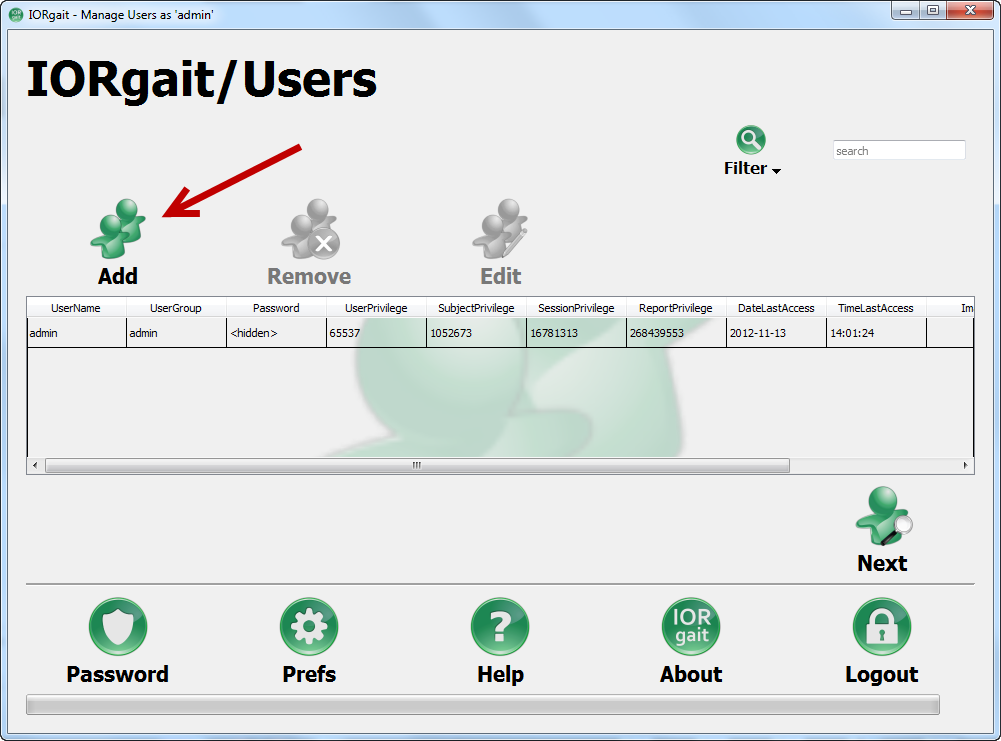
2. When on the User screen click on the Add User Button. This will open the Edit User Record window.
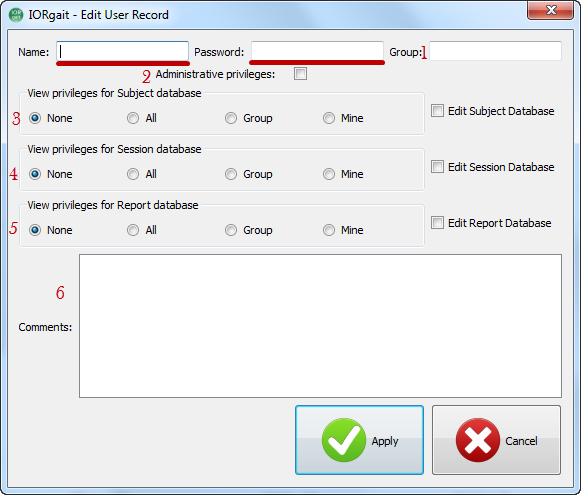
3.All user accounts require a username and a password (underlined in red). The password can be changed by the user when they login. Users can also be assigned to groups (1). This allows users who are in the same group to see each others patients, sessions and reports. At the moment a user can only belong to one group at a time. Users can be granted administrative privileges (2). A user who has administrative privileges has access to the users screen and can alter privileges and passwords for other users. They can also create and delete user accounts. Users may be granted different levels of access to Subjects (3), Sessions (4), and Reports (5). If the privilege level is set to none the user will not be able to see the page associated with the database in question. Note: if None is selected for all three databases then the user will not be able to logon since they don't have permission to see anything. If the privileges are set to Mine they will only be able to see the sections (be it a subject, session, or report) that they have created. If the privileges are set to Group then they will only be able to see the sections (be it a subject, session, or report) that a member of their group (including themselves) has created. If the privileges are set to All then they will be able to see all of the sections (be it a subject, session, or report) that are in the database regardless of who created it. If the Edit Subject Database checkbox is selected then the user will be able to edit any of the sections (be it a subject, session, or report) that they can see.
After the Patient Leaves
12. Label the data that you have collected in the lab using the list of marker names in the “Marker Placement” table. You will use the software associated with your cameras to do the labeling. For further instructions on how to label see the instructions associated with the software/hardware system that you are using.
13. Export your labeled trials to c3d. At this point you should have a file with three folders. One static calibration with the word “static” in the file name and two walking trials with the word “walk” in the file name.
14. Open IORgait and login with your user name and password. At this point you can download the sample data and use it to generate a report.
15. If this is the first time that this patient has been collected create a new subject in the Data bas by cliking the Add Subject button. If this patient has been collected before and they are already a subject in the database confirm that none of their personal information has changed and proceed to step number 17.
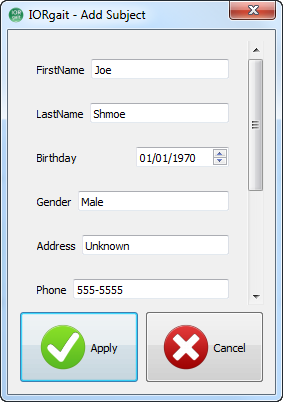
16. In put the following information into the Add Subject window, then click Apply. If you are using the Sample data provided above you may fill in what ever names and other information you please. This will not effect the report generated it is simply for your personal records.
- First Name
- Last Name
- Birthday
- Gender
- Address
- Subject's phone number
- Doctor's name
- Doctor's contact information
- Diagnosis
- Comments
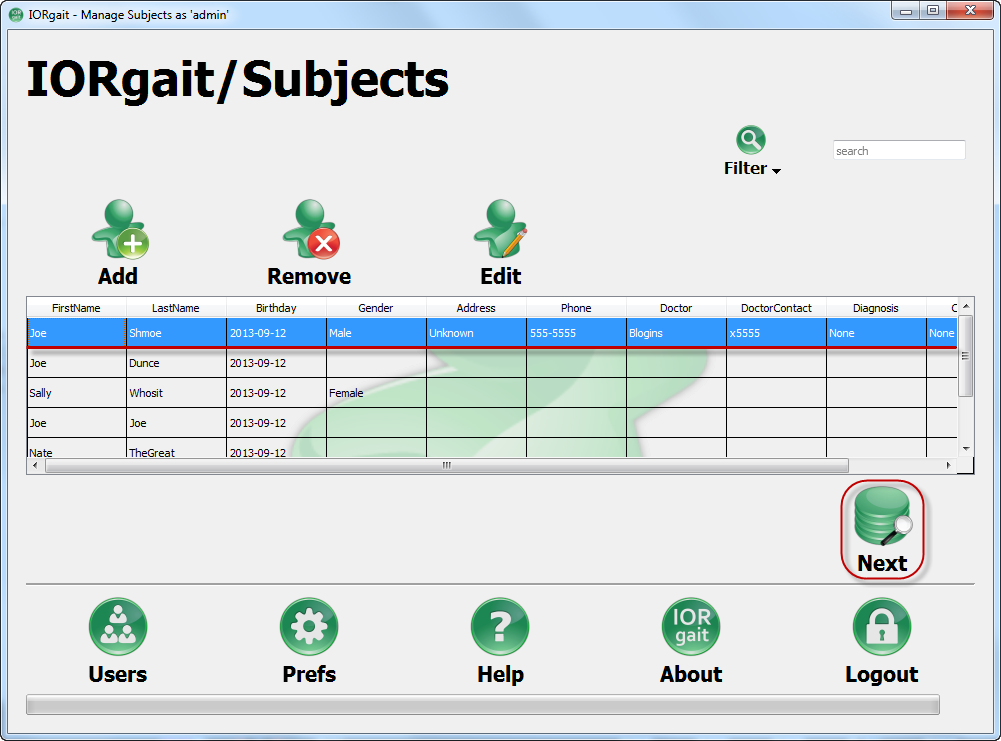
17. Highlight the subject that you are working with and click on the Next button at the bottom right hand side of the screen to navigate to the Sessions screen.
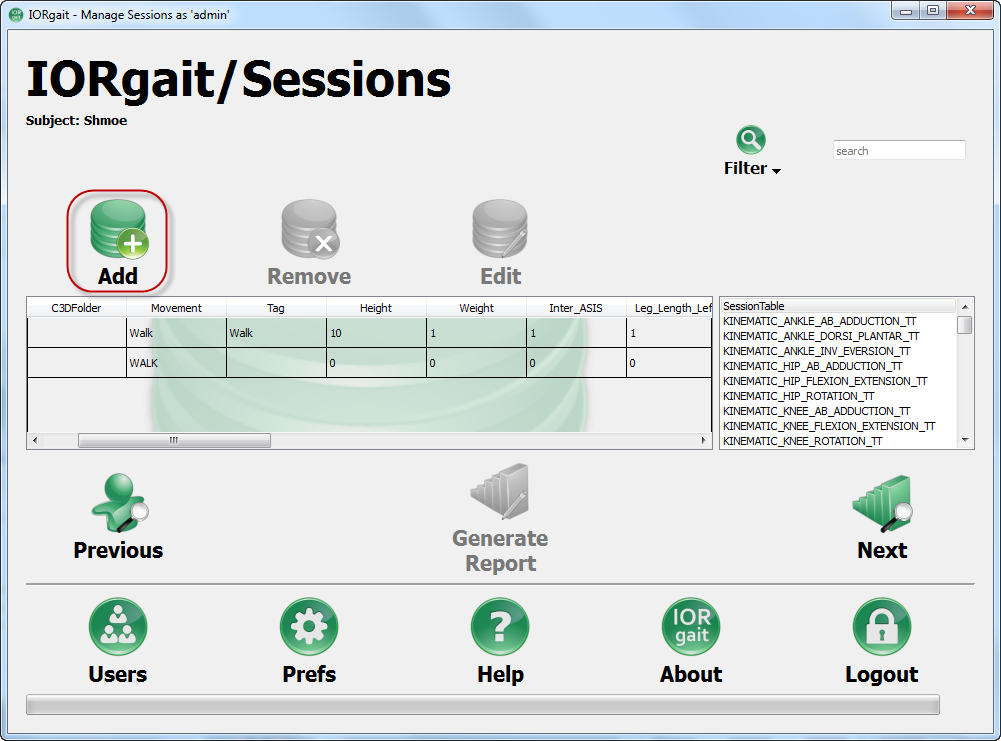
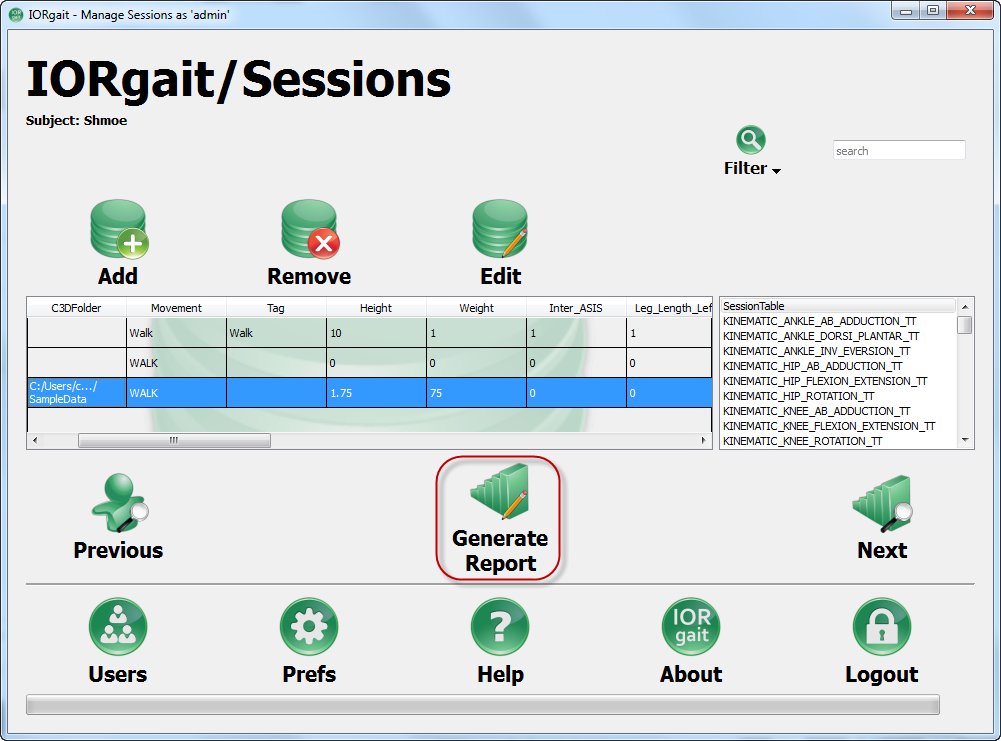
18. Create a new session by clicking on the Add Session button.
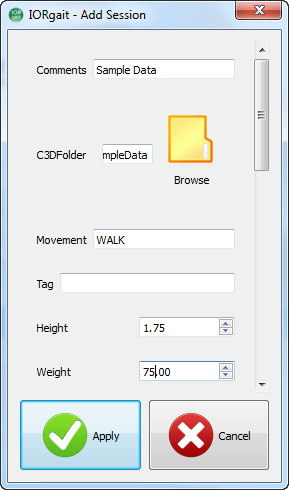
19. Fill in all relevant fields of the report window. The required fields are C3D Folder; which you use to indicate where the subject's file of c3d data is stored (you can do this by using the Browse button). You also need to enter the movement, height and weight. At the moment the only valid entry for the movement field is WALK (the field is case sensitive). Optional fields are tag (which allows you to sort your sessions by a convention of your choosing), inter ASIS distance, left and right leg length, left and right knee width, left and right ankle width, left and right foot width, left and right arch height, as well as right and left shoe size which you may chose to record if you are using these values. However unlike height, weight, and movement IORgait does not use these values in any of its calculations. If you are working with the sample data then input a height of 1.75 m, a weight of 75 kg, and a tag of WALK.
20. Select the session that you have just created and click on Generate Report.
21. Once you start generating a report IORgait will activate Visual3D in order to begin calculations. If receive an error saying “Can not locate Visual3D.exe Check user preferences” go here for instructions on how to locate Visual3D on your computer. If you receive a window asking you to locate the appropriate file go here for instructions on how to proceed and prevent this error in the future.
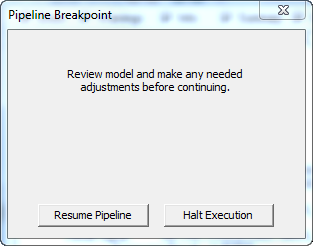
22. The first pipeline breakpoint that you should see (assuming that you avoided the errors listed in 21) is one that requests that you review the model and make any adjustments needed before continuing.
23. To check the model navigate to the main page of the Visual3D and click on the “Model” button at the top tool bar.
24. There are three things that you need to check on this screen.
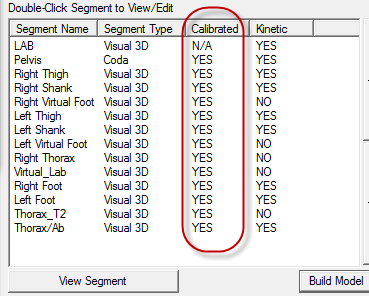
- First you need to look at the segment list on the left hand side of the screen. The Calibration status for all of the segments should read Yes as shown below.
- Second click on the bones button (circled below) and orientate the view screen on the right so that the subject is centered on the screen facing you. The bones should be in the correct position and orientation for a standard human being.
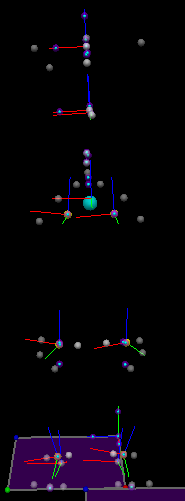
- Third remove the bones and inspect the coordinate systems. There should be one for each of the sections that were created, they have three axis, green (x-axis), red (y-axis), and blue(z-axis). When the subject's image is facing you the green axis should be pointing towards you, the red axis should pointing from left to right, and the blue axis should be up and down. A correct model is shown below.
25. Once all the criteria in 24 are correct click on the Resume Pipeline button in the Pipeline Breakpoint window.
26. The next Pipeline Breakpoint that you reach will be to check that the Right Foot contact is correct.
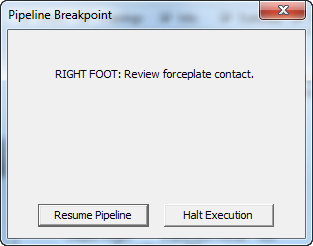
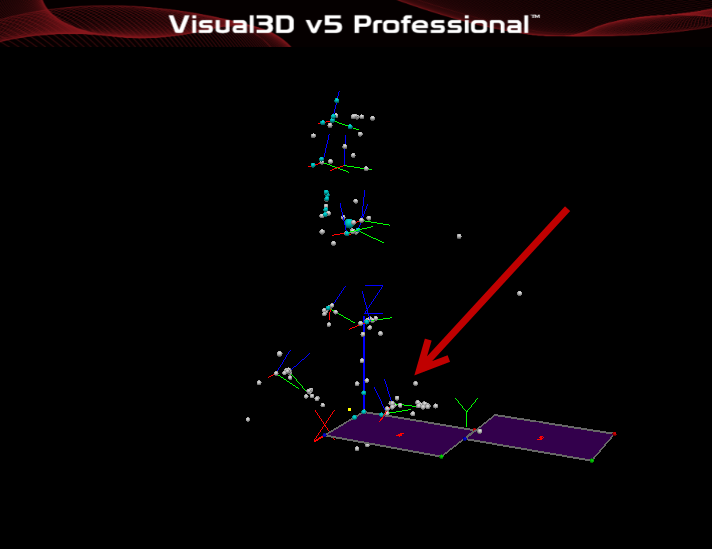
27. Use the viewer window to see which of the subjects feet is coming into contact with the force plate. You may need to adjust the orientation of the viewer to clarify the patient's left from their right. The graphics below show the right foot making contact with the first force plate. Once you confirm that the contact is correct click the Resume Pipeline button on the Pipeline Breakpoint window.
28. The next Pipeline Breakpoint that you reach will be to check that the Left Foot contact is correct.
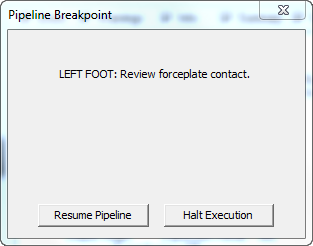
29. Use the viewer window to see which of the subjects feet is coming into contact with the force plate. You may need to adjust the orientation of the viewer to clarify the patient's left from their right. The graphics below show the left foot making contact with the second force plate. Once you confirm that the contact is correct click the Resume Pipeline button on the Pipeline Breakpoint window.
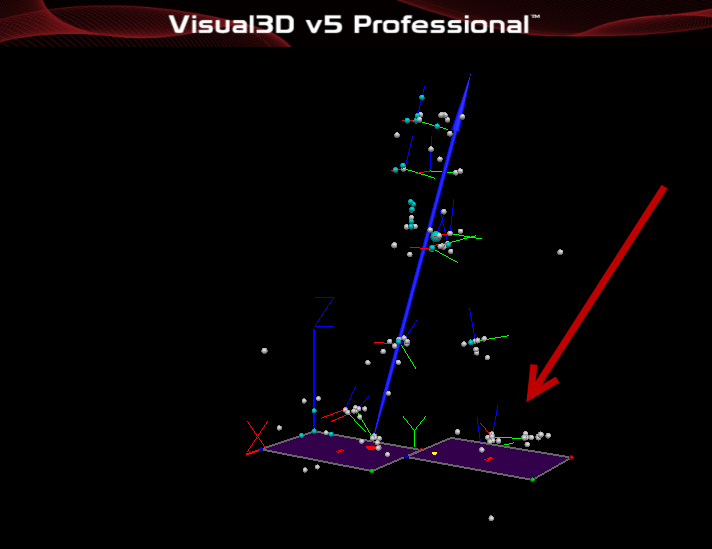
30. You will need to repeat steps 26 through 29 as many times as necessary to see all contacts. If you are using the sample files you will need to repeat 26 through 29 twice.
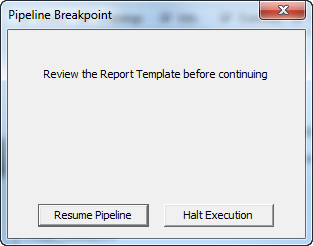
31. The next Pipeline Breakpoint that you reach will be to check that the report is correct.
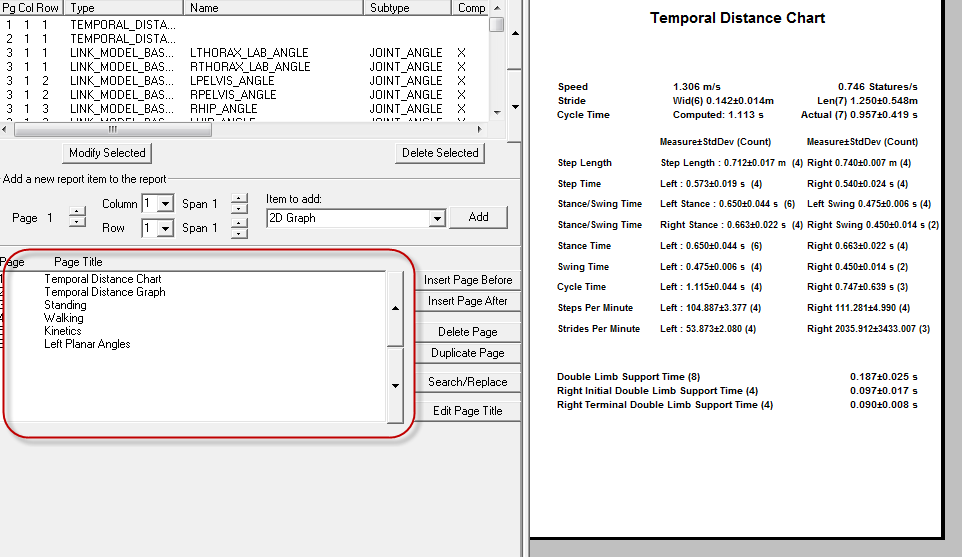
32. Navigate through the list of pages (circled in red below) and check that the graphs and values on the right hand of the screen make sense. This is your last chance to make edits to the data. Once the report is generated you will need reprocess from the beginning to make changes to the report.
33. Once you are happy with the report click the Resume Pipeline button on the Pipeline Breakpoint window.
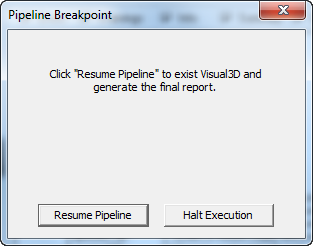
34. You will be presented with a final Pipeline Breakpoint window. Click the Resume Pipeline button on the Pipeline Breakpoint window to exit Visual3D.
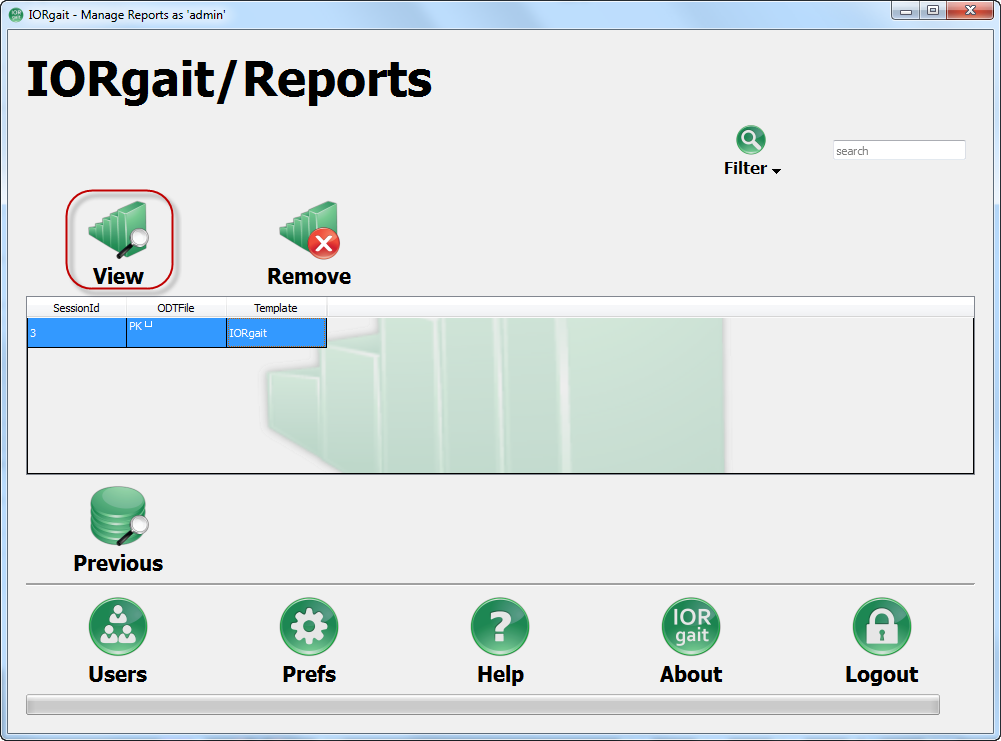
35. The report has now been created and you have been returned to the IORgait report page. Select the report that you have created and click the View Report button. This will open the report in OpenOffice.
36. You can now save to your computer or print the report for your records. A copy will remain in the IORgait database until it is explicitly removed.
Documentation
Login Page
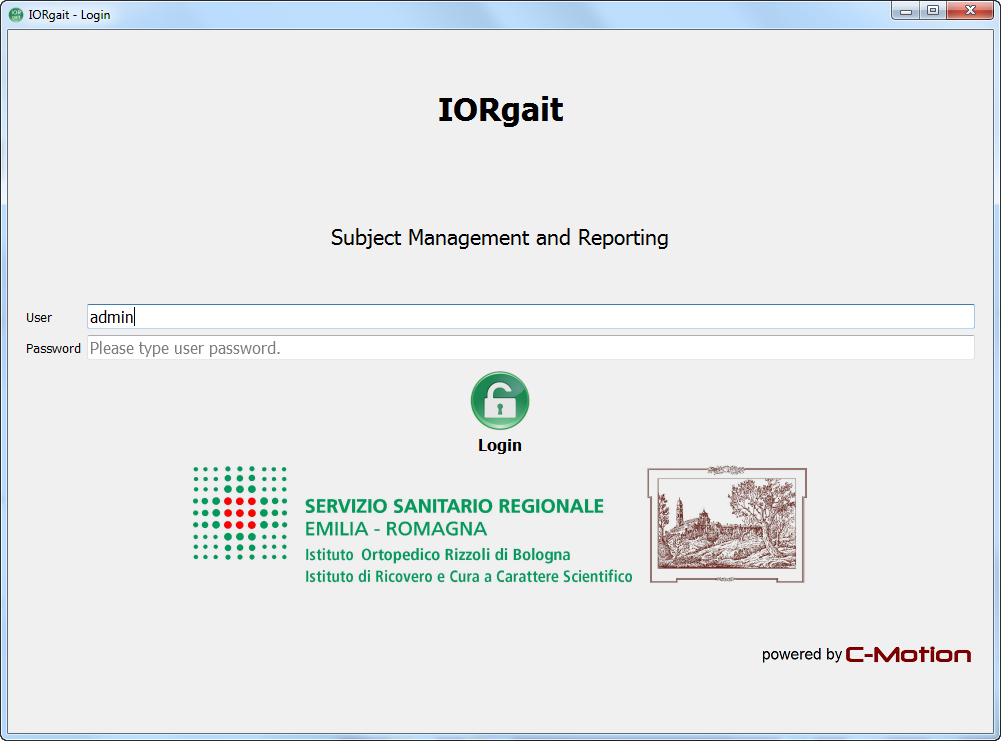
Above is the login page. All users will be required to login in order to access the patient information stored in the IORgait program. User names and passwords are set by the administrator account initially, after which the user can personalize their password.
Subjects
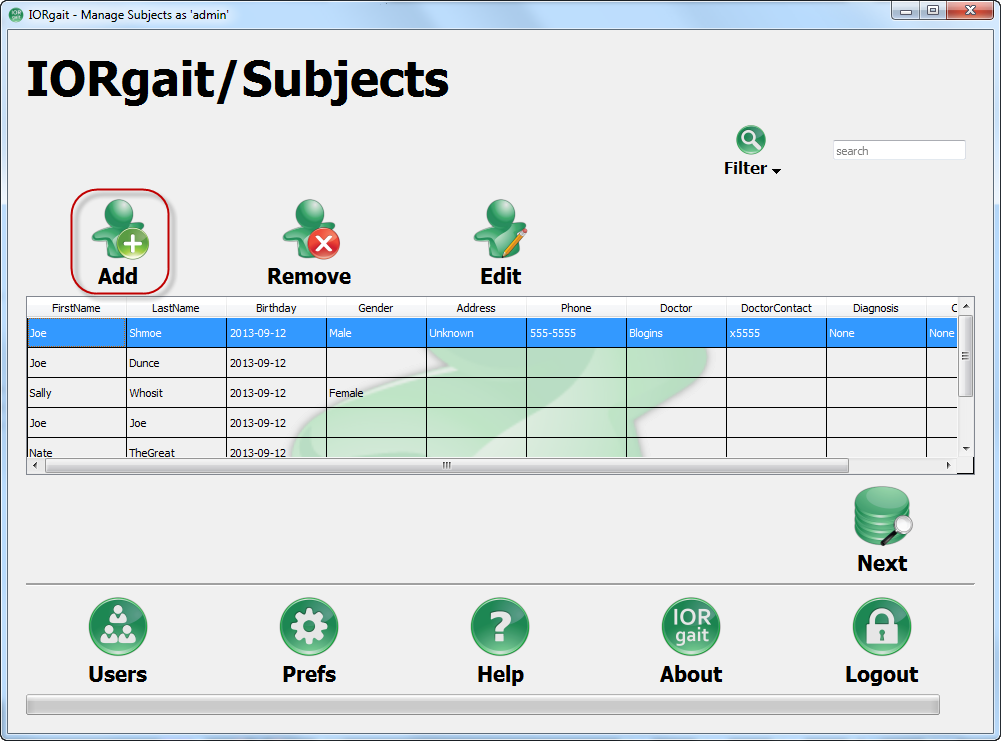
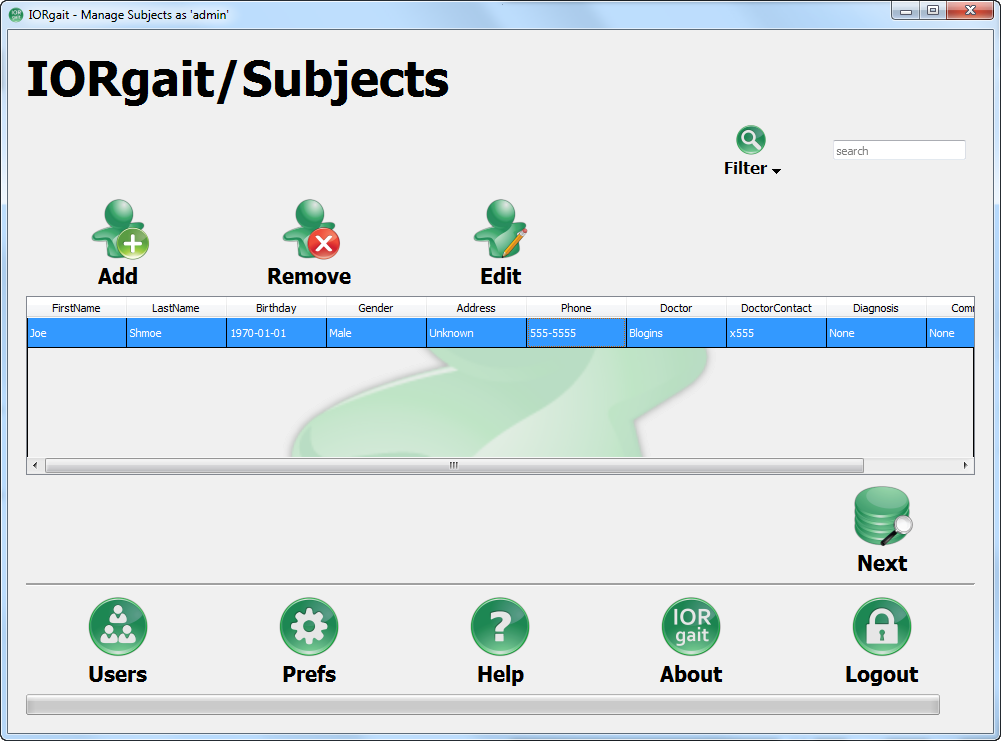
The subject screen is the first screen that you will see after logging in. This screen allows you to view, add, and edit subject information. Each user will only see the subject's who's information they have permission to see.
Add Subject
The Add Subject button allows you to add a new subject to your data base. When you click it the Add Subject window will be opened. This allows you to input subject information including first name, last name, birthday, gender, address, subject's phone number, doctor's name, doctor's contact information, diagnosis, and comments. When you click Apply the subject will be added to the data base and you will be able to see the subject's information in the subject table.
Remove Subject
The Remove Subject button allows you to permanently remove a subject from your records. When you remove a subject from your data base you may also automatically remove the sessions and reports that are associated with them depending on how you have set your preferences options. In order to delete the subject you must select a subject, which will highlight the subject blue. This will activate the Remove Subject button which you can use to delete the subject. You can also delete a subject by selecting the subject and pressing either Delete or Backspace on your key board.
Before removing the subject permanently IORgait will present you with the above dialogue box in order to insure that a subject is not mistakenly removed. Click Yes will delete the subject, clicking No will leave the subject in the database.
Edit Subject
The Edit Subject button allows you to make changes to a subject's information. By selecting one of the subjects listed in the subject table you activate the Edit Subject button. Clicking the Edit Subject button opens a dialogue box, called the Edit Subject dialogue box, with all the same fields as the Add Subject dialogue box. The Edit Subject dialogue box may also be opened by double clicking on the subject you wish to edit in the subject table. Once you have adjusted what you wish to the subject's information the Apply button on the bottom left will save the changes to disk, whereas the Cancel button on the bottom right will close the Edit Subject window without making changes to your subject information.
Filter Subject
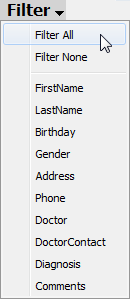
The Filter function allows you to limit which subjects you see and search for a specific subject. When you click on the filter button you will be presented with the dropdown menu seen to the right. You can filter by all types of subject information (first name, last name, birthday, gender, address, phone number, doctor's name, doctor's contact, diagnosis, or comments.) For example if you chose to filter by doctor's name and then type Blogins into the search box you will see all the subjects who are being treated by doctor Blogins. Selecting the Filter All option will select all of the options (first name, last name, etc.) at the same time. Filter None will deselect all of the options. Should you select more than one option it will default to the option that is closest to the top of the list.
Users
The Users Button will take you to the Users Page. This button is available exclusively to those who have administrative privileges. From the User screen you can add and delete user accounts as well as adjust permissions.
Password
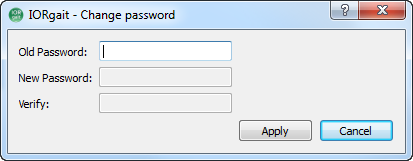
The Password button allows you to change the password that you use to login. For administrators it is found at the bottom left of the Users Page, for all other users it is found at the in the place of the Users button at the bottom left of the Subjects, Sessions, and Reports page. When it is selected the dialogue box to the right will be opened. You are required to enter your current password and then enter your new password twice to make sure that the password is not changed in error.
Prefs
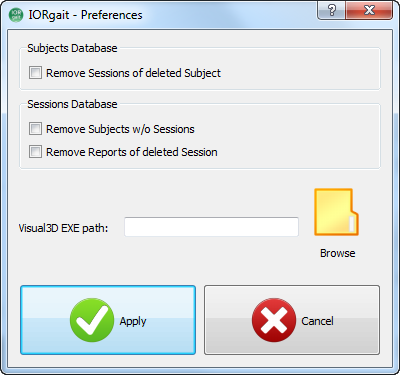
The Prefs button opens the Preferences window. This allows you to control your data management.
Remove Sessions of deleted Subject - If this checkbox is selected then when you delete a subject from your data base you will also delete all the sessions that are associated with this subject.
Remove Subjects w/o Sessions - If this checkbox is selected then when you delete all of the sessions associated with a subject then the subject will also be deleted from the data base.
Remove Reports of delete Session - If this checkbox is selected then when you delete a session from your data base you will also delete all of the reports that are associated with this session.
Visual3D EXE path - In order for IORgait to generate a report it must process the data that you input through Visual3D. In order to access Visual3D for this portion of the process you need to indicate where Visual3d is installed. You can do this either by typing the file path into the text field or by using the browse button. Typically Visual3D is installed on your hard drive under Program Files or Program Files(x86). If you have difficulty see the Troubleshooting page “Locating Visual3D.exe on your computer.”
Apply/Cancel - In order for the changes that you make to take effect you must click the Apply button. If you click Cancel in order to close the Preferences window before clicking on Apply then you will lose any changes that you have made.
Help
About
The About button opens the About IORgait window. This window contains the licensing key, the activation code, the version number, development information, and contact information for support. The Deactivate Application button located at the bottom right of the window allows you to deactivate your licensing key. Details on deactivation can be found in the deactivation tutorial.
Logout
The Logout button will sign you out of IORgait and return you to the Login screen. It is advisable to sign out whenever you are going to leave your computer unattended in order to prevent unauthorized personnel from accessing subject data. Once you logout you will need to provide a user name and password to reenter IORgait.
Next
The Next button allows you to navigate along the report creation process. Clicking the Next button on the Subjects screen will take you to the Sessions page. The Sessions screen will only show you the sessions associated with the subject who is selected when you click on the next button.
Sessions
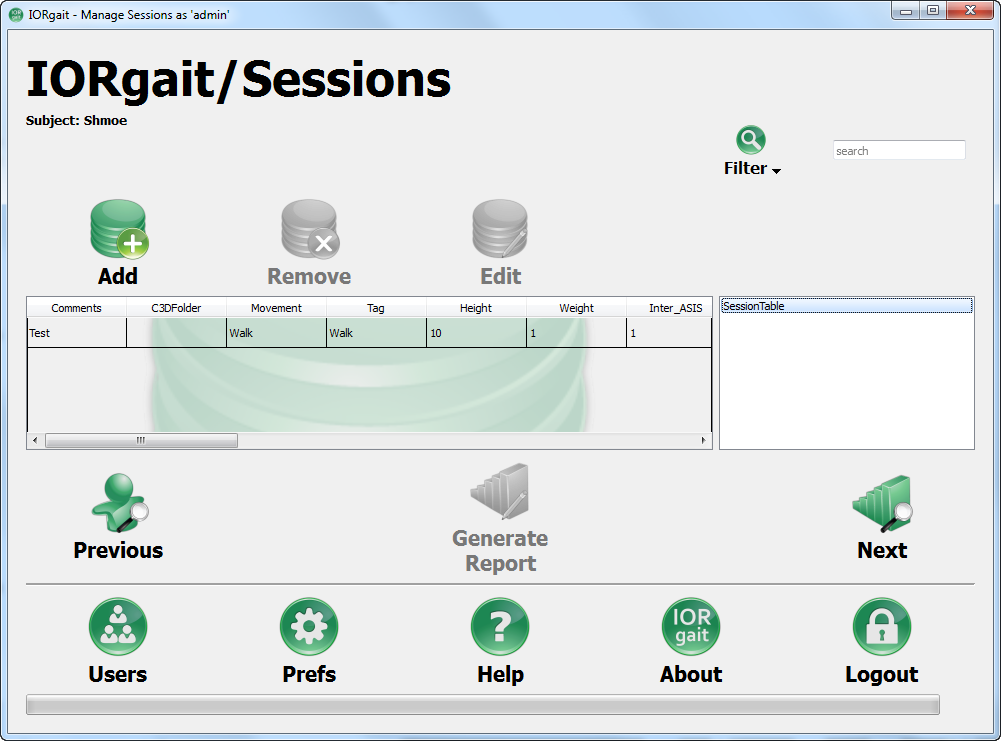
The Sessions allows you to add c3d file data and patient measurements for each visit or treatment session.
Add Session
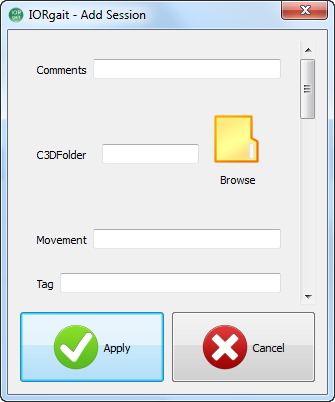
The Add Session button allows you to add a new sessions for a subject in your data base. When you click it the Add Session window will be opened. This allows you to input subject information which is specific to a particular session. This information includes comments, the file path to that sessions c3d files, movement, tag, height, weight, inter ASIS distance, left and right leg length, left and right knee width, left and right ankle width, left and right foot width, left and right arch height, right and left shoe size, and diagnosis. When you click Apply the subject's information for the session will be added to the data base and you will be able to see the information listed by session.
Remove Session
The Remove Session button allows you to permanently remove a session from your records. When you remove all of a subject's sessions from your data base you may also automatically remove the subject and reports that are associated with them depending on how you have set your preferences options. In order to delete the session you must select a session, which will highlight the session in blue. This will activate the Remove Session button which you can use to delete the session. You can also delete a session by selecting the subject and pressing either Delete or Backspace on your key board.
Before removing the session permanently IORgait will present you with the above dialogue box in order to insure that a session is not mistakenly removed. Click Yes will delete the session, clicking No will leave the session in the database.
Edit Session
The Edit Session button allows you to make changes to a subject's session information. By selecting one of the sessions listed in the table you activate the Edit Session button. Clicking the Edit Session button opens a dialogue box, called the Edit Session dialogue box, with all the same fields as the Add Session dialogue box. The Edit Session dialogue box may also be opened by double clicking on the session you wish to edit in the table. Once you have adjusted what you wish to the subject's session information the Apply button on the bottom left will save the changes to disk, whereas the Cancel button on the bottom right will close the Edit Session window without making changes to your subject's session information.
Session Table
The session table on the right of the screen allows you to view the values that have been calculated from a session. In order for these values to appear a report must have been created from the session which was selected. If more than one report has been generated from a session then the last report generated will be the one that populates the table.
Previous
The Previous button allows you to navigate backwards along the report creation process. Clicking the Previous button on the Session screen will take you to the Subjects page.
Generate Report
The Generate Report button takes the subject and session specific data that you have entered and sends it along with the c3d files to Visual3D. This will allow a number of values to be calculated and sent back to IORgait which will compile a report. This report can be accessed via the Reports page.
Next
The Next button allows you to navigate along the report creation process. Clicking the Next button on the Sessions screen will take you to the Reports page. The Report screen will only show you the reports associated with the session which is selected when you click on the next button.
Reports
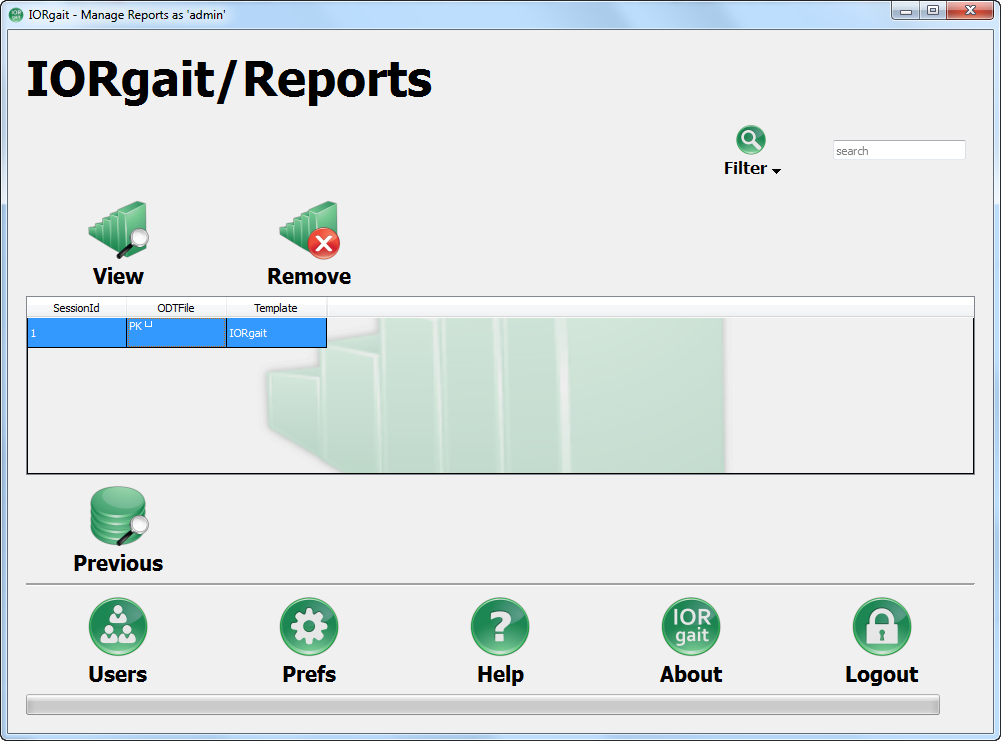
View Report
The View Report button opens the report that your have selected in the report list. The report will be opened in Office and may subsequently be converted to pdf.
Remove Report
The Remove Report button allows you to permanently remove a report from your records. In order to delete a report you must select the report, which will highlight the report in blue. This will activate the Remove Report button which you can use to delete the report. You can also delete a report by selecting the report and pressing either Delete or Backspace on your key board.
Before removing the report permanently IORgait will present you with the above dialogue box in order to insure that a report is not mistakenly removed. Click Yes will delete the report, clicking No will leave the report in the database.
Previous
The Previous button allows you to navigate backwards along the report creation process. Clicking the Previous button on the Report screen will take you to the Sessions page.
Users Page
Add User
The Add Users button allows you to add a new user to your IORgait program. When you click it the Add User window will be opened. This allows you to input the information required to make a user account. This information includes name, password, group, privileges, and comments. When you click Apply the user will be created and you will be able to see them in the list.
Remove User
The Remove Users button allows you to permanently remove a user from the program. In order to delete a user you must select the user, which will highlight the user in blue. This will activate the Remove User button which you can use to delete the user. You can also delete a user by selecting the user and pressing either Delete or Backspace on your key board.
Before removing the user permanently IORgait will present you with the above dialogue box in order to insure that a user is not mistakenly removed. Click Yes will delete the user, clicking No will leave the user in the program.
Edit User
The Edit User button allows you to make changes to a user's permissions. By selecting one of the users listed in the table you activate the Edit User button. Clicking the Edit User button opens a dialogue box, called the Edit User Record dialogue box. The Edit User dialogue box may also be opened by double clicking on the user you wish to edit in the table. Once you have adjusted what you wish to the user's permissions the Apply button on the bottom right will save the changes to disk, whereas the Cancel button on the bottom right will close the Edit User Record window without making changes to the user's permissions.
Next
The Next button allows you to navigate back to the report creation process. Clicking the Next button on the Users screen will take you to the Subjects page.
Password
The Password button allows you to change the password that you use to login. For administrators it is found at the bottom left of the Users Page, for all other users it is found at the in the place of the Users button at the bottom left of the Subjects, Sessions, and Reports page. When it is selected the dialogue box to the right will be opened. You are required to enter your current password and then enter your new password twice to make sure that the password is not changed in error.
Troubleshooting
Locating Visual3D.exe on your computer
If you are having trouble locating where Visual3D is installed you will need to follow the following steps.
1. Confirm that your lab has purchased a copy of Visual3D and that it has been installed on the computer that is running IORgait.
2. Open your windows button at the bottom left corner of the screen.
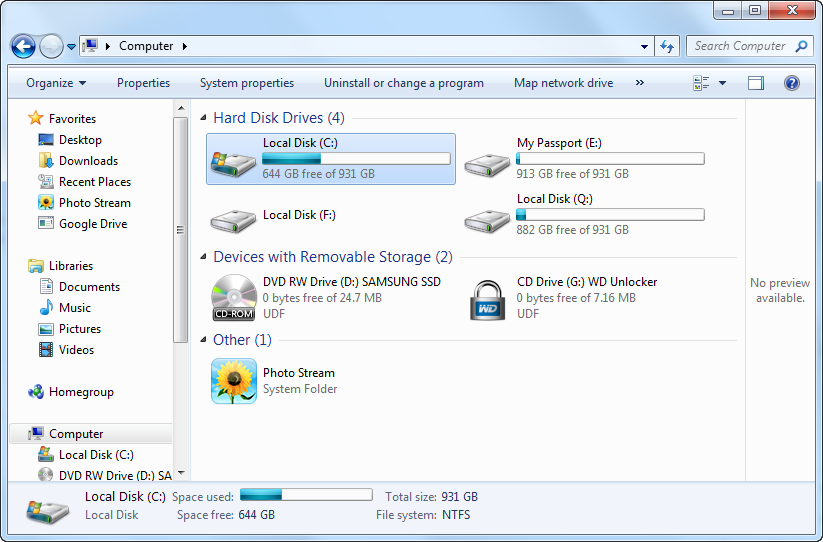
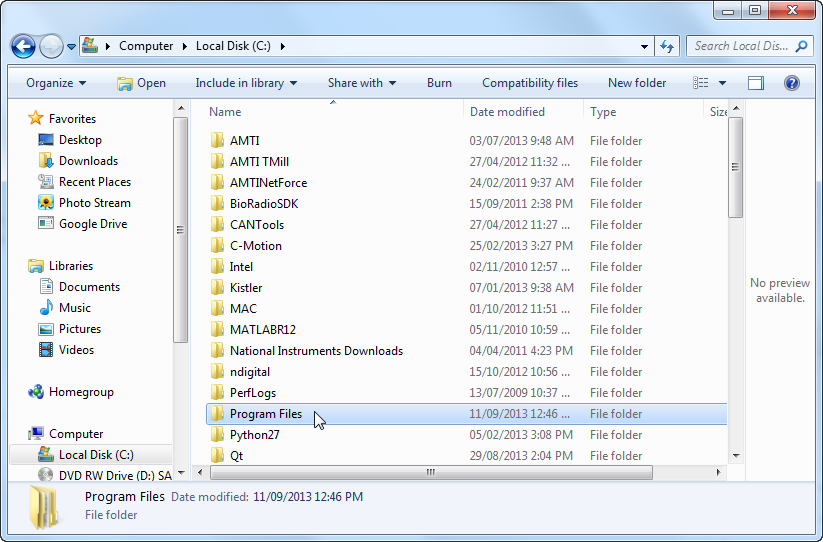
3. Select your hard drive which is typically named the C: drive as it is in this example screen shot.
4. Find the file folder called either Program Files or Program Files(x86) and open it. In the example below the folder is called Program Files.
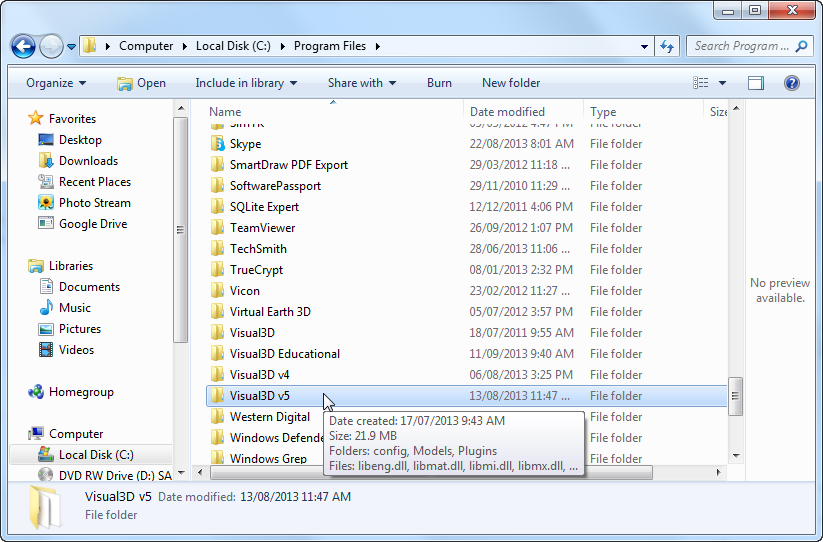
5. Navigate through the list of programs available on your computer until you find the file that has the newest version of Visual3D, open this folder. In the example below the folder is called Visual3D v5.
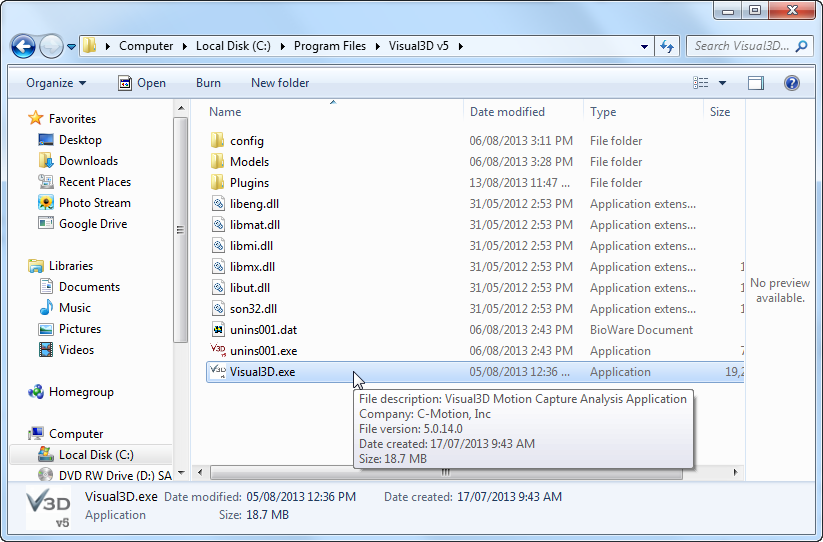
6. Within the Visual3D v5 folder is the Visual3D.exe, this is the application that you have been searching for.
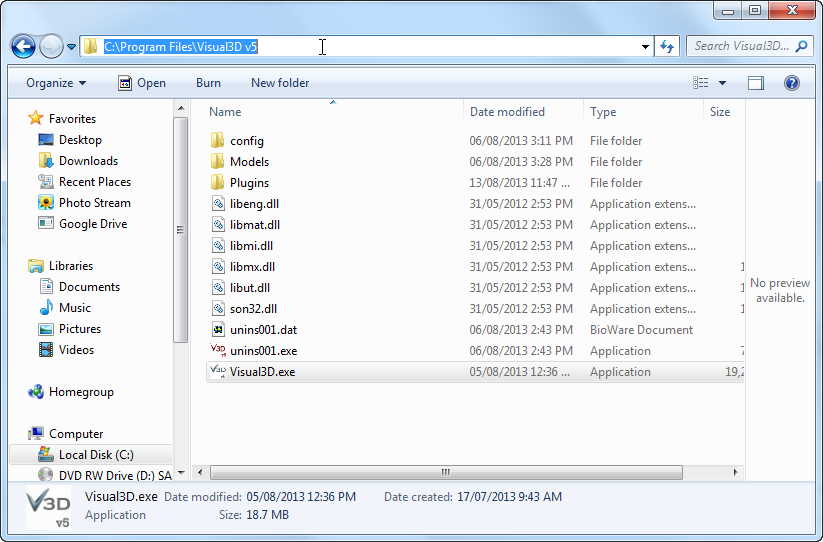
7. You now have two options. You may either return to the Preferences window and use the Browse button to navigate to where you have located the Visual3D.exe application or you can click on the navigation bar at the top of the window as shown in the example below. You can copy and paste the file path (in the example the file path is C:\Program Files\Visual3D v5) into the text box beside Visual3D EXE path in the Preferences window.
8. If you have been unable to complete steps 5 through 7 return to the window seen in step four.
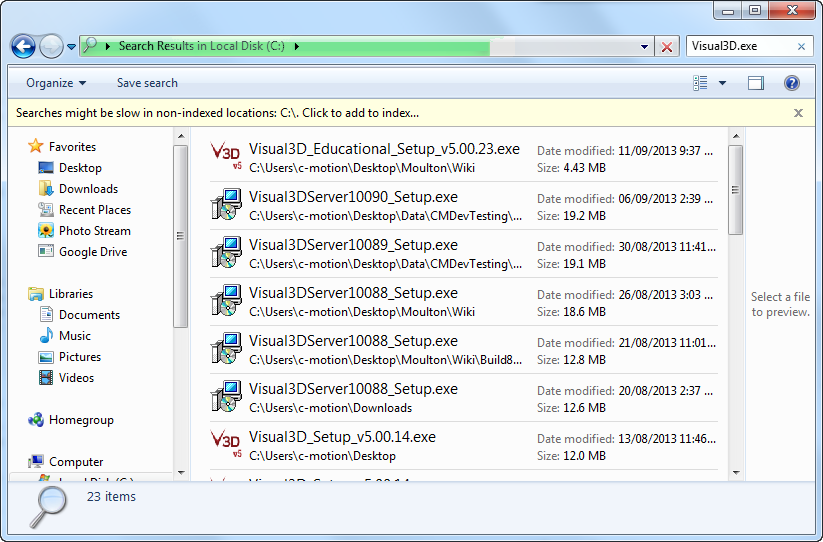
9. Type “Visual3D.exe” into the search function at the top right of the window. This will search and find all files and applications that have Visual3D.exe in their name. If you get no search results then Visual3D is likely not installed on your computer and you will need to buy/install Visual3D. Ideally the search will return a small number of results and you can find the file path by looking at the text beneath the icon. In the example the file path for the first search result is C:\Users\c-motion\Desktop\Moulton\Wiki. Please note that if you have multiple Visual3D versions or C-Motion products you may have a very large list of possibilities, and that narrowing it down may be difficult.

