Table of Contents
Treadmills
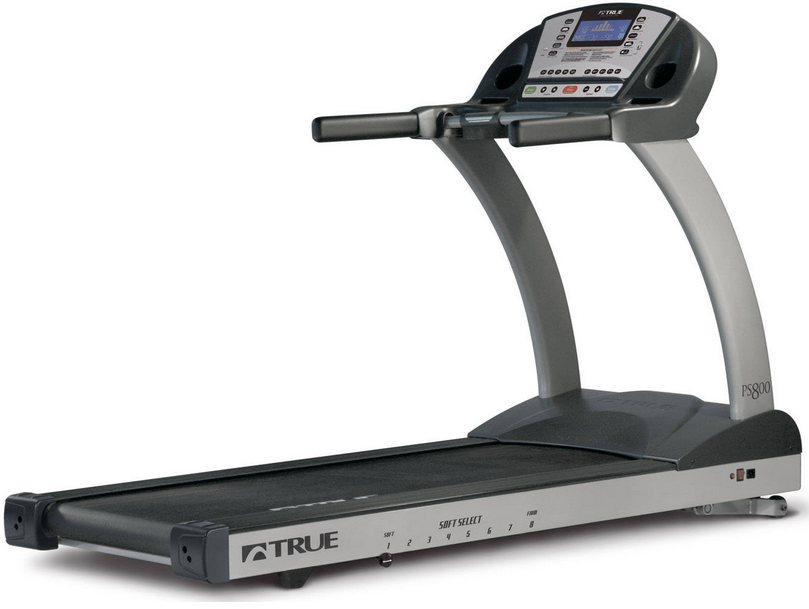
Properly modelling instrumented treadmills in Visual3D and analysing the measurements the record requires an in-depth understanding of the treadmills themselves and careful attention to several factors. This page is designed to organize that information in one place for ease of reference.
The general goal when analysing data from instrumented treadmills is to give Visual3D enough information that you can then process these trials in the same way that you would process overground trials.
Instrumented Treadmills
In modelling instrumented treadmill data in Visual3D you will need to set appropriate baselines and thresholds, filter your ANALOG signals, and use processed ANALOG signals for calculating the GRF. You will also need to verify force assignments before continuing on.
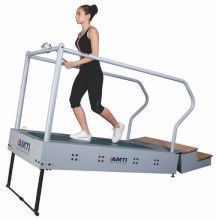
If you are using an inclined instrumented treadmill then you should read the following section as well.
Analog Signal Baseline Values
For instrumented treadmills, it is critical to set appropriate baselines for the analog signals that compensate for bias in the amplifiers. For fixed force platforms this is accomplished by specifying a range of frames for which the platform is unloaded (see Force Platform Zero Parameters). Note that this baseline is independent of the minimum force threshold and serves the purpose of removing bias from the analog signals when the force platforms are unloaded.
This is most easily accomplished using the FP_Auto_Baseline command, which automatically determines the appropriate baseline values to remove from each analog signal. It accomplishes the following three tasks:
- Zeros the force signal without having to specify a frame range (AUTO_ZERO);
- Defines the minimum force platform value based on the noise in the signal (AUTO_FP_MINIMUM); and
- Looks before and after the signal is loaded to find when the signal crosses the reduced FP minimum to ensure as much of the signal is used as possible (USE_REDUCED_FP_MINIMUM_AROUND_FORCE).
FP_Auto_Baseline
! /FP_NUMBER=
! /AUTO_ZERO=TRUE
! /AUTO_FP_MINIMUM=TRUE
! /USE_REDUCED_FP_MINIMUM_AROUND_FORCE=TRUE
! /REDUCED_FP_MINIMUM=5.0
;
The minimum force platform value is determined by identifying the values of the plate during all the periods where the plate is unloaded. Each force component is used to determine the set of frames containing median values for each component, and a single representative minimum force frame is determined from these values.
Set Minimum Force Threshold
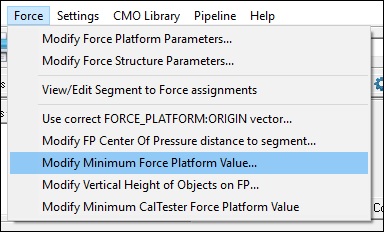
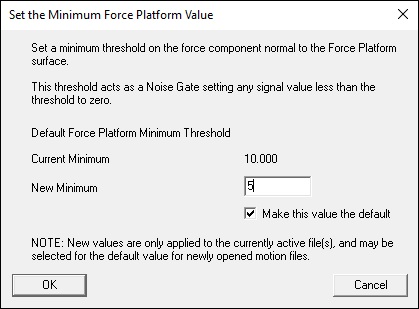
The Visual3D Force Menu includes an option to set a threshold for force platform/structure data. This threshold value is used to remove noise from the force signals. Most force platform manufacturers recommend a minimum of 50 N for treadmill data, which is higher than for overground gait trials.
If the computed force is less than this minimum force threshold, then the FORCE and FREEMOMENT are set to zero and the COFP is set to DATA_NOT_FOUND.
This value can also be set using the pipeline command Set_Force_Platform_Threshold. In this case the RECALC pipeline must be run to update any kinetic signals in the workspace.
Set_Force_Platform_Threshold
! /THRESHOLD=20
! /SET_AS_DEFAULT=FALSE
;
Filter the ANALOG signals
If desired, you can filter the ANALOG signals from your instrumented treadmill in the same way that any other signals can be filtered.
1. Filter the ANALOG data.
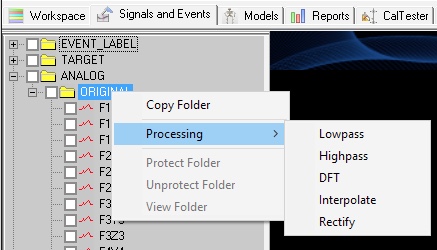
- Expand the data tree in the Signal and Event Processing tab.
- Right-click the ANALOG data type's ORIGINAL folder.
- Left-click the Lowpass option.
- Select Done to execute the command.
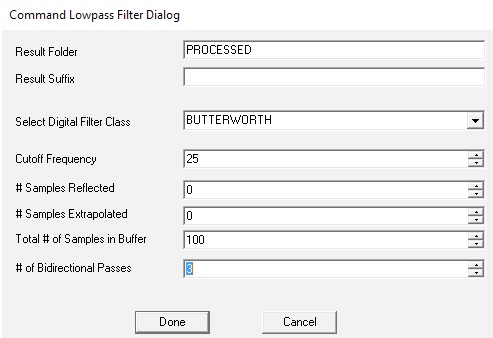
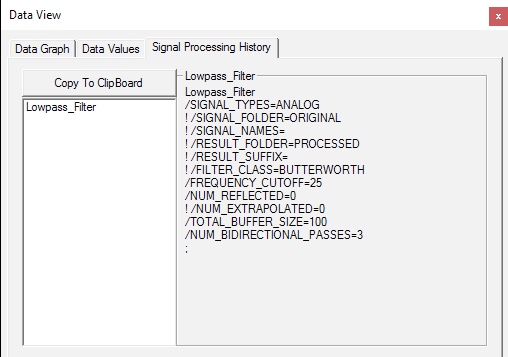
2. Specify the desired parameters for the Lowpass Filter Command. Example:
- Cutoff Frequency: 25
- Samples Reflected: 0
- Samples Extrapolated: 0
- Samples in Buffer: 100
- Bidirectional Passes: 3
3. Check that data was filtered:
- Note that a PROCESSED folder exists under the ANALOG data type in the data tree.
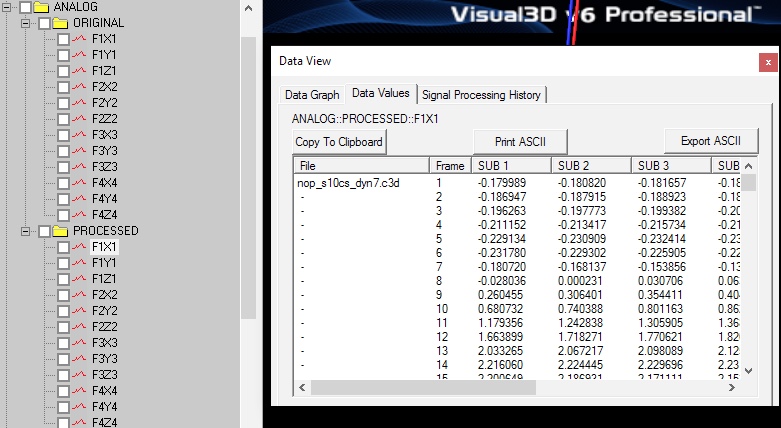
- Left-click the PROCESSED folder to expand it and then left-click to select the signal ATFfx. A dialog will appear containing 3 tabs.
- In the Data View tab, note the column headings SUB1, SUB2, etc. These refer to the subframes of the analog signal that arise because the analog sampling rate is higher than the motion capture point rate.
- The Column SUB1 contains the frames of data that are synchronous with the Motion Capture frames.
4. Select the History tab to display the signal's processing history.
5. Hit Recalc to update the workspace
- No changes will be made to dependent signals until Recalc is hit.
NOTE: These steps can also be done using the pipeline using the Lowpass_Filter and Recalc commands.
Use Processed Analogs for Ground Reaction Force Calculations
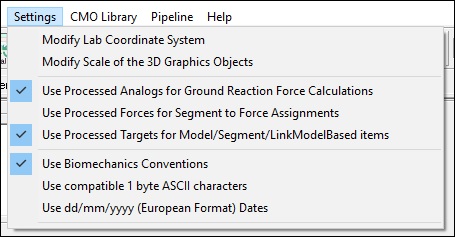
Specify that PROCESSED ANALOG signals should be used for computing the Ground Reaction Force. You want use Processed TARGETs and ANALOGs (check these options) but leave Use Processed Forces unchecked.
Force Assignment
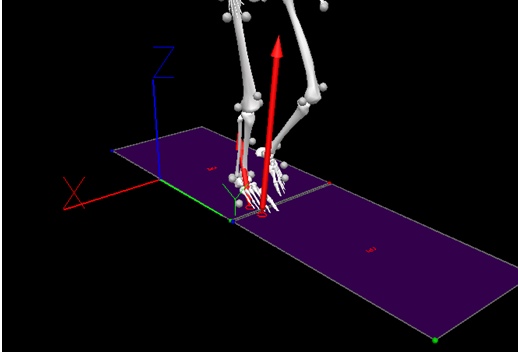
The force assignments to segments should be computed automatically by Visual3D. It is vitally important that you check these Force Assignments for validity, e.g. that complete stance phase is assigned, that only one foot in contact with a platform at a time, etc., because Visual3D's event detection is based on Force Platform Assignments, not on the FORCE signals.
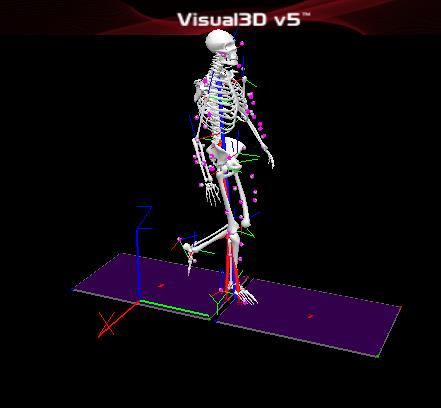
In the figure below the presence of the blue arrow displays the combined force vector from the two platforms.
Inclined Treadmills
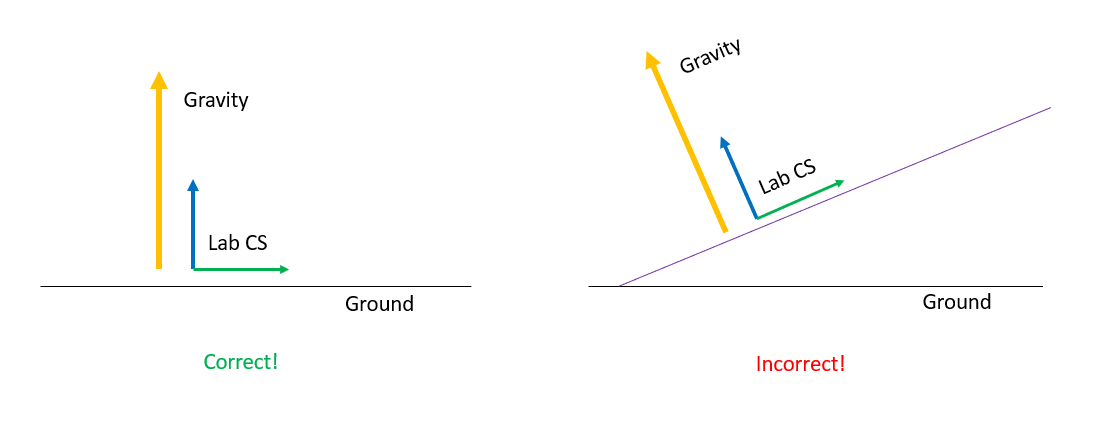
Inclined treadmills present additional modelling considerations since Visual3D must account for gravity when calculating dynamics. Visual3D defines gravity along one of the principal axes of the lab, which means the origin of the motion capture volume should be set level with the ground. If the origin is set by placing an L-frame on the treadmill, the treadmill cannot be inclined when the origin is set: it must be level.
Most labs define the position and orientation of the force platforms in the treadmill's level position in the motion capture volume. This makes sense because the treadmill is most often in used in the level position, and many labs set the origin of the lab on the treadmill (and the treadmill must be level if you are going to do this). This means the position and orientation of the force platform corners is incorrect when the treadmill is inclined.
There are two ways to handle this:
- Use a jig to define the location of the force platform when the treadmill is inclined; or
- Use targets to define the force platform corners when the treadmill is inclined
Since the treadmill's belts will almost certainly prevent you from placing targets directly on top of the force platforms, using a jig is the preferred method and should result in more accurate force platform location.
Using a Jig
In Visual3D, gravity is defined along a principal axis of the lab. When you set the origin in your motion capture software, the vertical axis is perpendicular to the plane the calibration tool (wand or L-frame) is on. This means if you defined the origin of the lab by placing the calibration tool on an inclined surface (like an inclined treadmill), gravity will be pointing in the wrong direction!
A jig (or cluster of 3 targets) can be used to define the location of the force platform. To create a jig, you need a set of three targets that will have the same position/orientation relative to each other, and relative to the force platform. For example, consistently placing three targets in the same location of the treadmill would act as a jig. When using a jig (a cluster of targets), the user must first define the location of the force platforms in relation to the targets. This step should be done once. Instructions to complete this step can be found in the CalTester Locate the Jig Tutorial.
Once the location of the force platforms has been found, you can now use the targets to define the force platform corners in 3D space. This would be done during each collection.
To do this you would calibrate the lab and set the lab origin with the treadmill level. Then place the jig on the treadmill. You could then do one of the following: - You can then incline the treadmill and collect a trial with just the jig, and update the force platform parameters in your motion collection software You could also collect an inclined trial with the subject walking on the treadmill where the jig (or a trial with just the jig) and update the force platform parameters in Visual3D when post processing. Instructions to complete this step can be found in the CalTester Use Jig to define FP corners Tutorial.
* NOTE: It is a good practice to use CalTester every few months to locate your force platforms. By using CalTester periodically, you are able to check that nothing in your lab has changed (the wand is not bent, the lab is not being set differently, etc.)
Using Targets to Define the Corners
Targets may be placed on the treadmill to define the force platform corners and the force platform parameters may be updated based on the location of the targets in 3D space.
An example of this is described here.
Kinematics
If you are using a standard treadmill or an instrumented treadmill, you will need to account for the treadmill speed and direction when calculating certain kinematic measures such as the temporal distance measures.
Visual3D's built in Temporal Distance command is designed to handle treadmill data. Accurately calculating temporal distance measures while the subject is walking on a treadmill requires the user to specify the orientation of the treadmill in lab space (direction), and the speed of the belts (speed). For user's using a split belt treadmill with the belts running at different speeds, “Use Split Belt Speeds” must be selected and the different speed of each belt must be specified. If both belts are running at the same speed, do not check “Use Split Belt Speeds” and only specify one speed.
Kinetics
As with all kinetic measures, it is important that the force platform be accurately located in the motion capture volume. With typical overground force platforms, the user is able to see the force platform corners, making it easier to define the location of the force platforms. With instrumented treadmills, the belts cover the surface of the platform, making it difficult to define the exact location/orientation of the force platforms.
The Platform Mode in CalTester can be very useful to identify the position/orientation of the force platforms. The force platforms should only be located in your lab volume once *.
If the force platforms are going to move (for example, an incline/decline treadmill), it will be necessary to update the force platform corners each time the treadmill position has changed. Two methods to update the force platform corners are described below in the “Inclined Treadmill” section.
Zeros
Typically, the force platforms are “zeroed” during a specified frame range of each trial. For example, during typical over ground gait, the force platforms are unloaded at the start of the trial, so the average force signal during frames 1-100 would be averaged and subtracted from the trial. For force platform trials, typically the trial starts with the subject on the force platform, so it cannot be assumed that the platform is unloaded during the first 100 frames of the trial. The frame range is specified in your force platform parameters (which is specified in your motion capture software).
More information about FP Zeros and how to implement them, can be found here.
Tutorials
The tutorial Modelling Instrumented Treadmills walks through these steps for a sample set of files.
The tutorial Treadmill Walking in Healthy Individuals demonstrates how Visual3D and Sift can be used together to analyse large-scale treadmill studies.

