User Tools

Site Tools


visual3d:documentation:modeling:functional_joints:example_-_functional_knee

Example - Functional Knee


When defining the functional knee joint, the calculation defines the axis of rotation, but not the location on the axis.

Two additional landmarks (RKneMed & LKneMed) must be created off the position of the mediolateral knee targets.

Sample files for this tutorial may be downloaded.

1) This tutorial will use the Static.c3d and Functional Knee.c3d files.

2) The Functional Hip.c3d file is used for the Functional Hip Tutorial.

3) FunctionalJoints_Hip_Knee.cmo contains a static trial with both the functional hip and knee defined.


The calculation of functional joints is described here.

Load Static Trial

1. From the Model menu, select Create → Hybrid Model from C3D file.

2. A dialog titled Select the calibration file for the new model will appear;


Select Static.c3d Click Open.
createstatic.jpg

Create Functional Joint

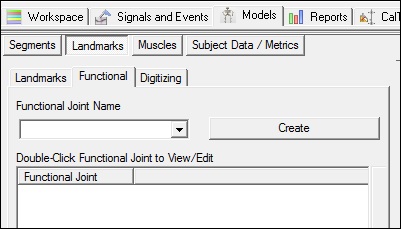
1. On the Landmarks tab:

1. Select the Functional tab
functionaltab.jpg

Create Right Functional Joint

1. On the Landmarks tab:

1. Select the Functional tab

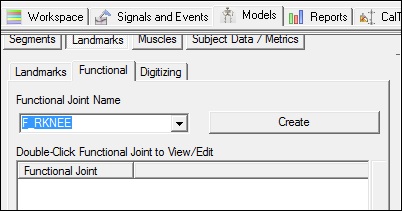
2. From the Functional Joint Name box, select F_RKNEE.

3. Click Create.
create_f_rknee.jpg
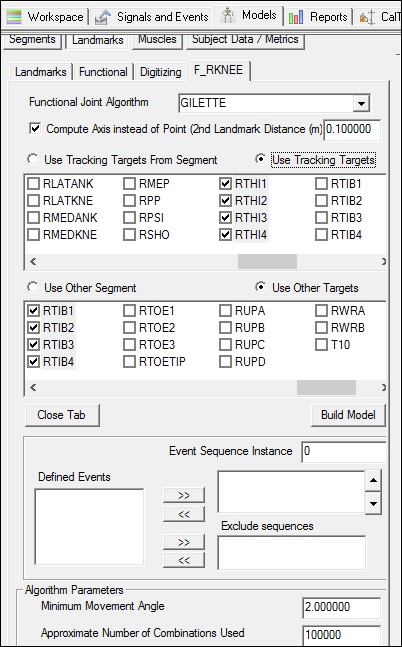
2. Select tracking targets for the F_RKNEE:

   Tracking Segment/Targets
   Select Use Tracking Targets (ctrl-click to multi select)
     RTHI1, RTHI2, RTHI3, RTHI4


   Other Segment/Targets:
   Select Use Other Targets (ctrl-click to multi select)
     RTIB1, RTIB2, RTIB3, RTIB4


Click on Close Tab before proceeding.
define_f_rknee.jpg

Create Left Functional Joint

1. On the Landmarks tab:

1. Select the Functional tab

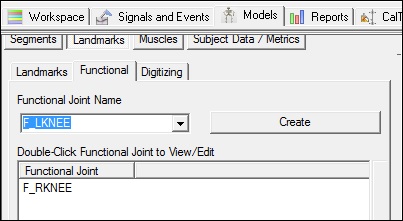
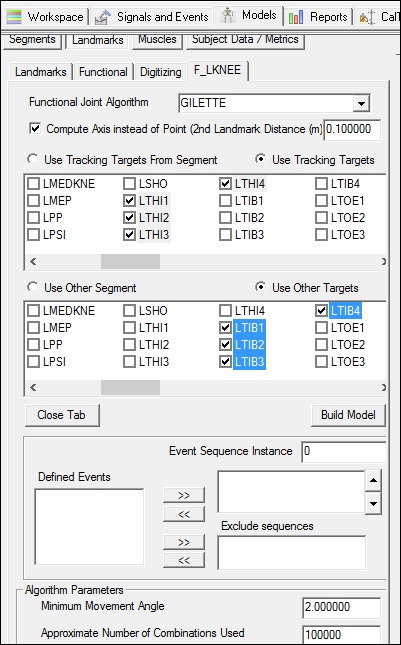
2. From the Functional Joint Name box, select F_LKNEE.

3. Click Create.
create_f_lknee.jpg
2. Select tracking targets for the F_LKNEE:

   Tracking Segment/Targets
   Select Use Tracking Targets (ctrl-click to multi select)
     LTHI1, LTHI2, LTHI3, LTHI4


   Other Segment/Targets:
   Select Use Other Targets (ctrl-click to multi select)
     LTIB1, LTIB2, LTIB3, LTIB4


Click on Close Tab before proceeding.
define_f_lknee.jpg

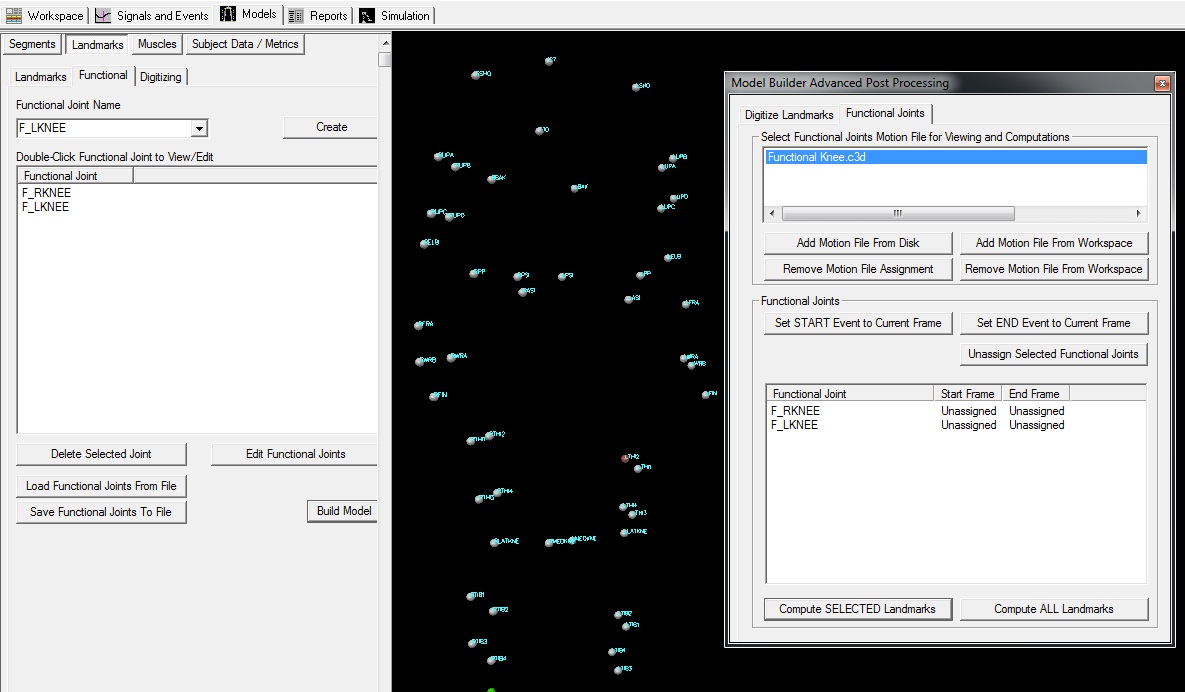
Model Builder Advanced Post Processing

1. Select the Post Processing button from the menu (image below)

modelbuilderadvancedpostprocessing_button.jpg

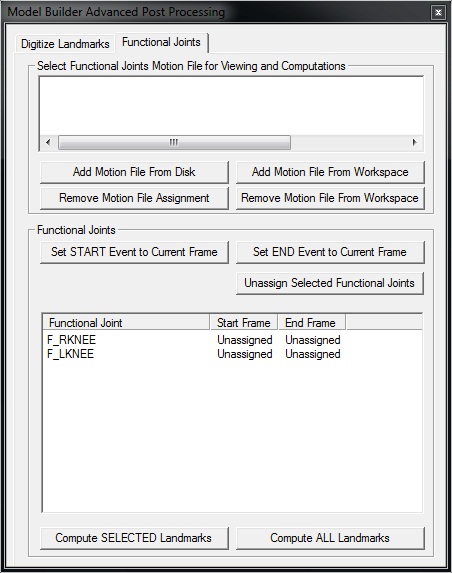
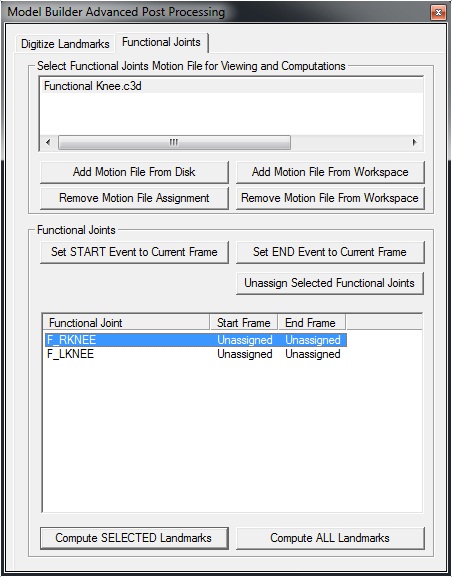
2. Select the Functional Joints tab from the dialog box (image on right)
mbapp_f_knee.jpg
3. Open functional movement file:

1. Select the Add Motion File From Disk

2. Browse to functional movement file, select Functional Knee.c3d

3. Click Open

4. Select the motion file by clicking on the trial, this will highlight the trial in blue.


mbapp_selectmotionfile_knee.jpg


NOTE: Once the trial has been selected, the name of the trial will be highlighted and the movement file will appear in 3D viewer.

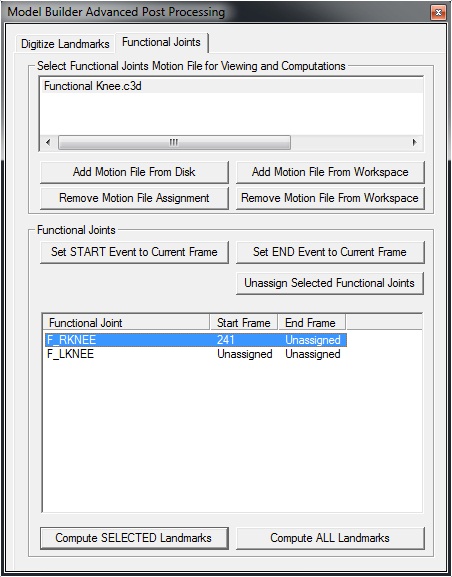
Define F_RKNEE Start and End of motion

1. Select the START frame of the right functional movement

1. Select F_RKNEE, this will highlight the joint in blue

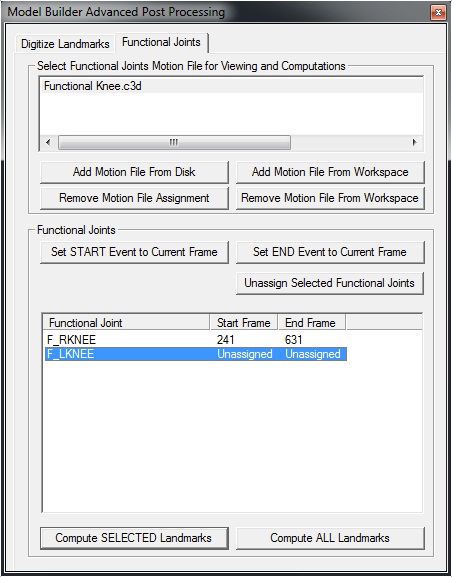
2. Using the slider (seen below), select the START frame of the right functional movement. Set the Start Frame to 241

mbapp_f_rknee_start_slider.jpg


3. Click Set START Event to Current Frame


mbapp_f_rknee_start.jpg


2. Select the END frame of the right functional movement

1. Select F_RKNEE, this will highlight the joint in blue

2. Using the slider (seen below), select the END frame of the right functional movement. Set the End Frame to 631

mbapp_f_rknee_end_slider.jpg


3. Click Set END Event to Current Frame


mbapp_f_rknee_end.jpg

Define F_LKNEE Start and End of motion

1. Select the START frame of the left functional movement

1. Select F_LKNEE, this will highlight the joint in blue

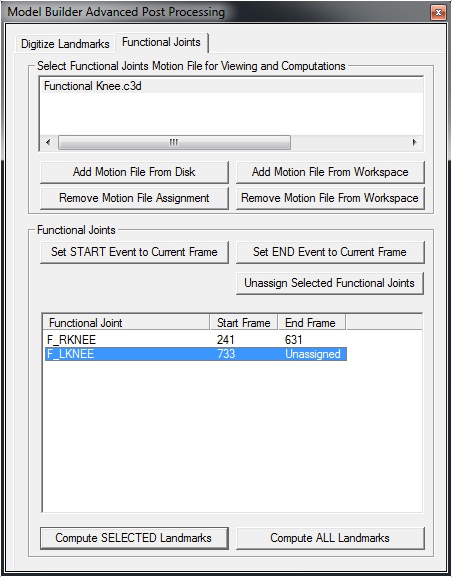
2. Using the slider, select the START frame of the left functional movement. Set the Start Frame to 733

3. Click Set START Event to Current Frame


mbapp_f_lknee_start.jpg
2. Select the END frame of the left functional movement

1. Select F_LKNEE, this will highlight the joint in blue

2. Using the slider, select the END frame of the left functional movement. Set the End Frame to 1149

3. Click Set END Event to Current Frame


mbapp_f_lknee_end.jpg

Compute Landmarks

1. Select Compute ALL Landmarks
2. Close the Model Builder Advanced Post Processing dialog box
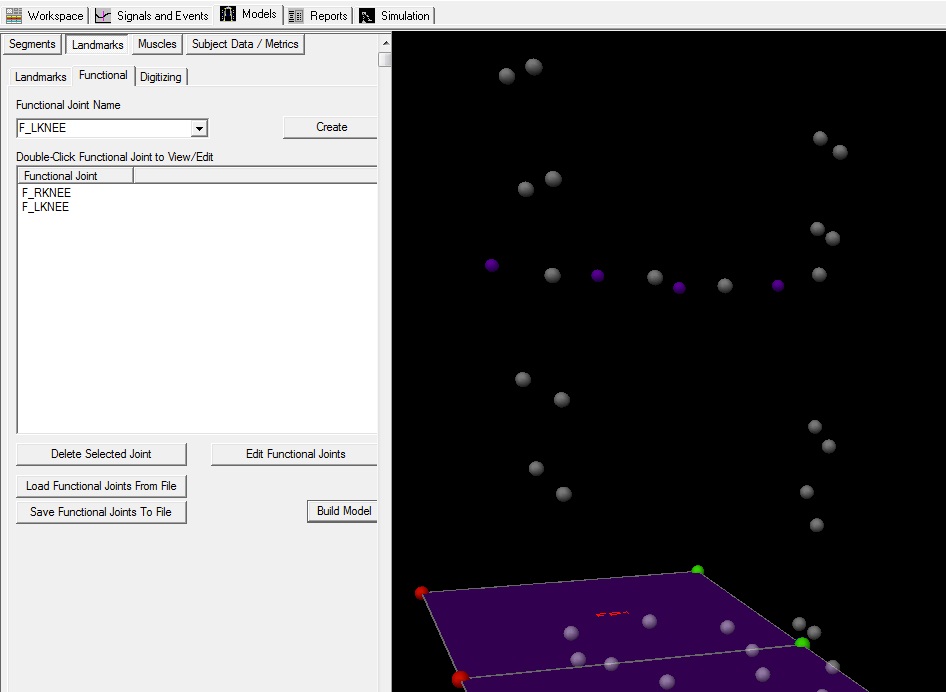
3. Four landmarks (F_RKNEE, F_RKNEE_X, F_LKNEE and F_LKNEE_X) should appear in purple in the 3D viewer


If the landmarks do NOT appear in the 3D viewer, check:
- That the landmarks are turned on (3D View Options)
- Check that all steps in this tutorial were completed
f_rknee_f_lknee.jpg

Compute Right Mediolateral Borders of the Knee Joint Center

The RKneLat and RKneMed landmarks created below will be used to define the mediolateral borders of the knee joint.

These landmarks will project the mediolateral targets (RLATKNE,RMEDKNE) onto the axis of rotation created by the functional joint (F_RKNEE,F_RKNEE_X).


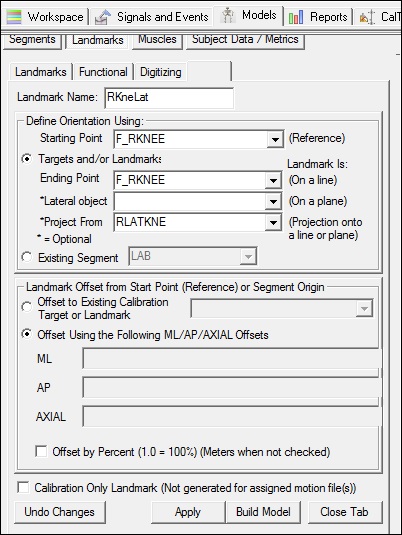
1. Create Lateral Border of the Right Knee Joint Center (RKneLat):


  1. Click Landmarks button


  2. Click Add New Landmark button


  3. Create Landmark: RKneLat

       Landmark Name: RKneLat


       Define Orientation Using:
       Starting Point: F_RKNEE
       Ending Point: F_RKNEE_X


       Project From: RLATKNE


  4. Do NOT Check: Offset by Percent (1.0 = 100%)


  5. Do NOT Check: Calibration Only Landmark

    rknelat.jpg


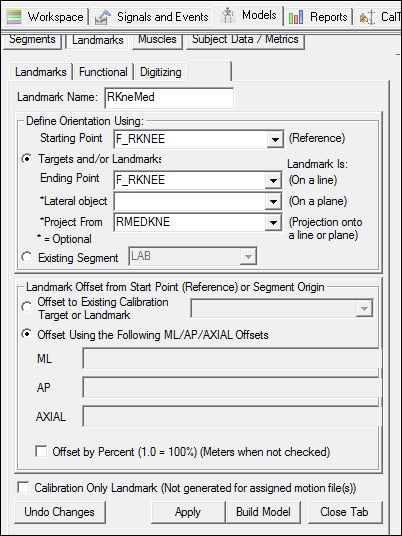
    2. Create Medial Border of the Right Knee Joint Center (RKneMed):


    1. Click Landmarks button


    2. Click Add New Landmark button


    3. Create Landmark: RKneMed

         Landmark Name: RKneMed


         Define Orientation Using:
         Starting Point: F_RKNEE
         Ending Point: F_RKNEE_X


         Project From: RMEDKNE


    4. Do NOT Check: Offset by Percent (1.0 = 100%)


    5. Do NOT Check: Calibration Only Landmark

      rknemed.jpg

      Compute Left Mediolateral Borders of the Knee Joint Center

      The LKneLat and LKneMed landmarks created below will be used to define the mediolateral borders of the knee joint.

      These landmarks will project the mediolateral targets (LLATKNE,LMEDKNE) onto the axis of rotation created by the functional joint (F_LKNEE,F_LKNEE_X).


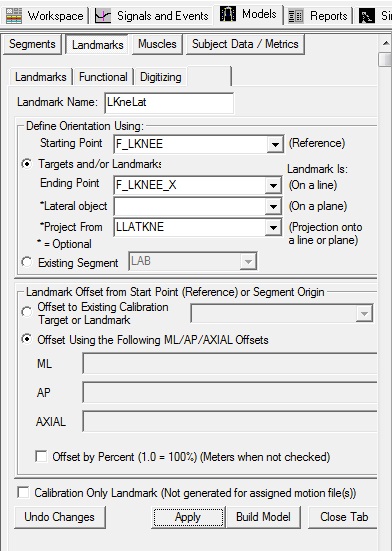
      1. Create Lateral Border of the Left Knee Joint Center (LKneLat):


      1. Click Landmarks button


      2. Click Add New Landmark button


      3. Create Landmark: LKneLat

           Landmark Name: LKneLat


           Define Orientation Using:
           Starting Point: F_LKNEE
           Ending Point: F_LKNEE_X


           Project From: LLATKNE


      4. Do NOT Check: Offset by Percent (1.0 = 100%)


      5. Do NOT Check: Calibration Only Landmark

        lknelat.jpg


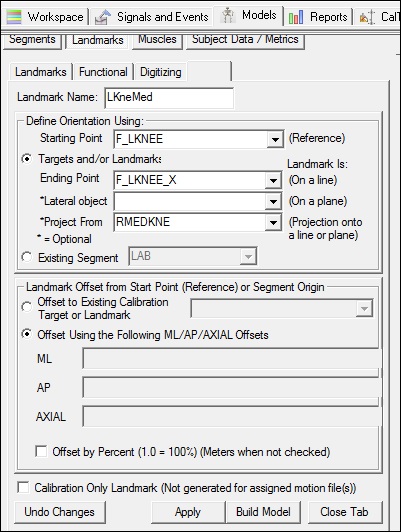
        2. Create Medial Border of the Left Knee Joint Center (LKneMed):


        1. Click Landmarks button


        2. Click Add New Landmark button


        3. Create Landmark: LKneMed

             Landmark Name: LKneMed


             Define Orientation Using:
             Starting Point: F_LKNEE
             Ending Point: F_LKNEE_X


             Project From: LMEDKNE


        4. Do NOT Check: Offset by Percent (1.0 = 100%)


        5. Do NOT Check: Calibration Only Landmark

          lknemed.jpg
          visual3d/documentation/modeling/functional_joints/example_-_functional_knee.txt · Last modified: 2024/07/17 15:45 by sgranger