Table of Contents
Building an IK Model
Introduction
This tutorial will show you step by step how to build an IK model. The file used for this tutorial is the file used for the Building a 6 DOF Model tutorial.
There is also a video tutorial available here
Tutorial
1. Open the file and go to the Models tab.
2. Under the Segments tab open the IK Constraints tab.
3. Click the New Chain button.
4. In the Create Linkage window type the name of the new linkage and click Okay.
5. You'll notice that the linkage you created shows up in the IK Constraints dialogue.
6. Under Segment select Pelvis
7. Under Parent choose LAB
8. You want the pelvis to have all six degrees of freedom so make sure all of the boxes are checked.
9. The new constraint will automatically appear in the window below
10. Keep the Linkage the same but change the Segment to Right Thigh and the Parent to Pelvis.
11. Select only the bottom row of Mobilizers.
12. The new constraint will appear.
13. Now set the Segment as Right Shank and the Parent as Right Thigh.
14. Add this constraint.
15. Set the Segment as Right Foot and the Parent as Right Shank
16. Add this constraint.
17. Set the Segment as Left Thigh and the Parent as Pelvis and add this constraint.
18. Set the Segment as Left Shank and the Parent as Left Thigh and add this constraint.
19. Set the Segment as Left Foot and the Parent as Left Shank and add this constraint.
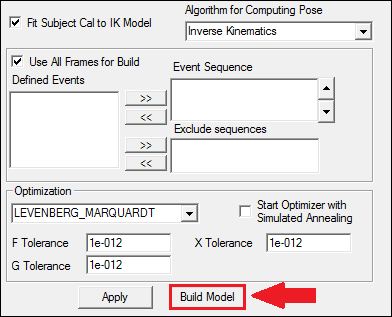
20. Click the Build Model button
21. Your IK model has now been built
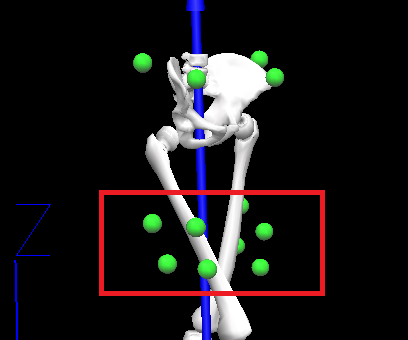
22. If your CMO has a motion file in it you will notice that building an IK Model will change the marker colour from white to green.


