Tag
| Language: | English • français • italiano • português • español |
|---|
Introduction
The file tagging mechanism allows you to define specific subsets of your C3D files, to facilitate processing these as a group. Tags can be made Active in the same fashion that individual files can be made active. Tags are a general way to set files as active since filenames are usually unique across workspaces because they are associated with the full pathname.
A tag can be anything ("PRE" or "POST", "Subject1" or "Subject2", "Walk" or "Run", etc.).
A file can have multiple TAGS associated with it. A TAG can have multiple files associated with it.
Using Tags
By setting a Tag as the Active File, it means all files associated with that tag will be processed.
You can use tags in a pipeline using the Select_Active_File command.
You can use tags in a Report Template to display only data associated with that tag.
Creating Tags:
There are multiple ways to create tags in Visual3D:
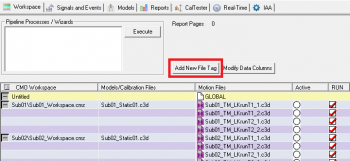
- (A) Workspace Tab
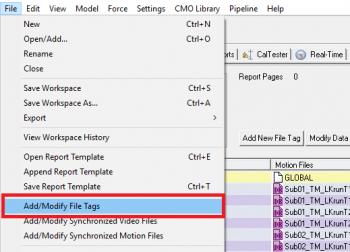
- (B) File -> Add/Modify File Tags
- (C) Pipeline
(A) Workspace Tab
- Using the workspace tab to create tags is a great way to create tags manually when you are interactively working with a file.
|
|
|
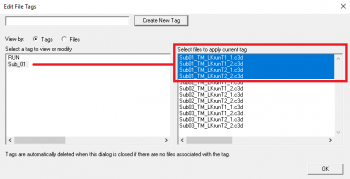
(B) File -> Add/Modify File Tags
- The benefit of going to File -> Add/Modify File Tags is that the dialog will allow you to select multiple files at once by clicking and dragging - instead of individually checking the check boxes as you do in the Workspace tab.
|
|
|
(C) Pipeline
- You can assign tags to files using the pipeline, as well as combine and remove tags.
- Using the Pipeline to create tags will be the most useful when automating your processing.
Removing Tags:
You can use the Remove_Tags pipeline command.
OR
Uncheck all files associated with a tag in the Workspace tab. Once a tag has no files associated with it, it will be deleted.


