CalTesterPlus Documentation
| Language: | English • français • italiano • português • español |
|---|
Collecting CalTester Data Trials
TOP of Rod BOTTOM of Rod |
|
The CalTesterPlus Application
UPDATE: The CalTesterPlus software application has been discontinued. The functionality is now available in Visual3D when a CalTester license key is provided. There is also a stand-alone version of Visual3D that ONLY supports the CalTester, and these options now replace the older software. Users of the old software should have access to the new software automatically when they log into our web downloads page.
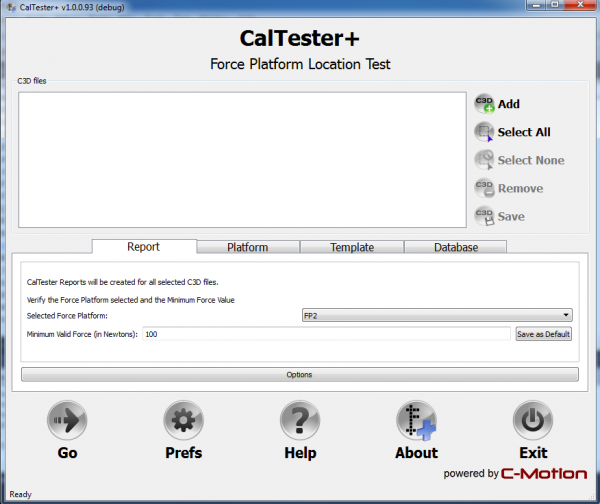
This is the main CalTesterPlus window which opens when the application is first launched. It is divided into two sections. The top of the screen allows you to add and remove files from your CalTesterPlus workspace. The bottom half of the screen allows you to navigate between Report, Platform and Jig mode. When the program launches it defaults to the Report Mode.
CalTesterPlus Workspace
The workspace section of CalTesterPlus allows you to manipulate the files that you are using. It also gives you access to general program controls like the settings window and the help button.
CalTesterPlus Report Tab
The Report Tab of CalTesterPlus is used to generate a report on one force platform using a single trial.
CalTesterPlus Platform Tab
The purpose of the Platform Tab is to use multiple files (at least 3, preferably more) to build a single report. This report contains the values that define the force platform's position in the lab. These values can then be copied into your data collection software to accurately locate the position of your force platforms.
CalTesterPlus Template Tab
The purpose of the Jig Tab is to compute the position and orientation of the platform based on the location of the Jig markers.
CalTesterPlus Database Tab
The CalTester results can be saved to a relational database.
