CalTesterPlus Tutorials Jig Location
| Language: | English • français • italiano • português • español |
|---|
Purpose
Using a Template allows you to determine where your force platforms are in relation to your camera system without repeating the entire CalTesterPlus platform protocol each time. In order to use this function you need to have a set of permanent markers (i.e. a template) which have a consistent position relative to the force platform.
The first step required when using CalTesterPlus to identify a Template is to locate the Template targets in the force platform coordinate system. For this reason both the CalTester rod and the Template must exist in these trials. The CalTester rod will be used to identify the center of pressure and the Template will be used to locate the targets.
Collecting
In order to use the CalTesterPlus program you need a set of trials that meet certain requirements.
Trials to create the Template must have:
- A minimum of 3 stationary targets and a maximum of 6 (often mounted on a metal frame)
- The CalTester Rod
During each trial:
- The CalTester Rod should be used to apply pressure to various positions on the force platform
- Pressure should be applied to a different location on force platform. The more surface area covered between all trials the more accurate the optimization
Each example motion trial found that is downloaded with the CalTesterPlus program found in the TutorialFiles folder meet the above criteria.
The sample files can be found on your C drive: C:\Program Files\C-Motion\CalTesterPlus\Samples\TutorialFiles
TrialBack1 through 11 correspond to trials for force platform 1 (FP1) Trial1 through 11 correspond to trials for force platform 2 (FP2)
Template Trials
Both the CalTester Rod and Template must be in each trial:
- Set up your capture volume making sure that all force platforms and cameras are in the positions that they will remain in for following data collections.
- Make sure that a Template with at least 3 markers (maximum of 6 markers) is correctly positioned relative to the force platforms.
- The trial needs to be at least 1 second long.
- For each trial, the CalTester Rod will be placed in various locations on the force platform. The average center of pressure applied by the CalTester Rod will be used to identify the location of the force platform in reference to the Template. The more spread out along the force platform, the more accurate the optimization will be.
Template
A Template will need to be created for each force platform (regardless of whether one Template is used to identify both platforms, or one for each platform)
Create Template For FP1
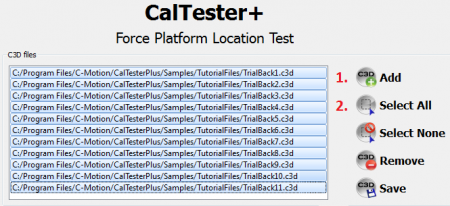
Load Files
|
Load FP1 trials:
|
Create Template
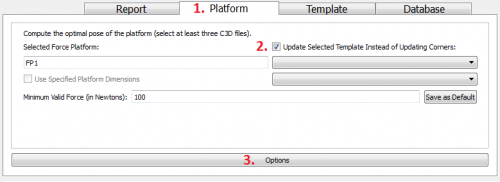
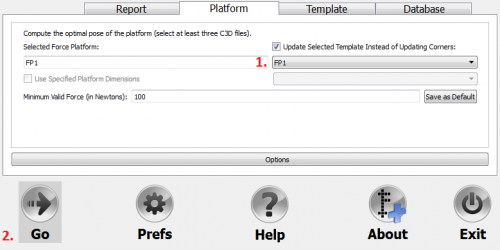
In the "Platform" tab specify that a Template file will be created:
|
NOTE: The Selected Force Platform defaults to FP1 based on the C3D files that were loaded into the workspace. This is one of several reasons that a template must be created for FP1 and FP2 separately.
Identify Marker Labels
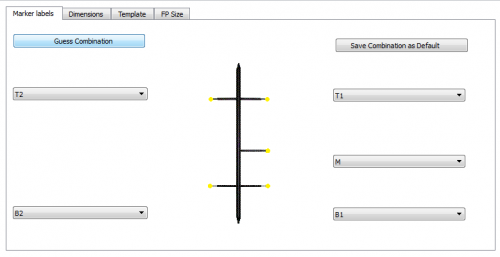
Identify marker IDs on the CalTester Rod:
|
Identify Dimension Settings
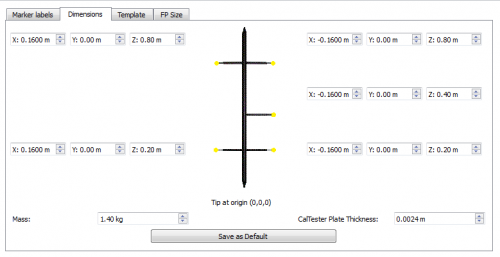
The default values in the Dimensions tab represent the size of the CalTester Rod sold by C-Motion. If you are using the sample data or the CalTester Rod manufactured by Motion Lab Systems you will not need to modify these measurements.
|
|
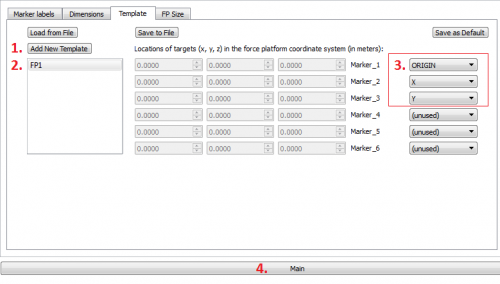
Identify Template Settings
Identify marker IDs on the Template:
|
Identify the Template relative to FP1:
|
NOTE: The "Save as Default" button can be used to save the template settings in CalTester Plus so that the program will default to this template name and target IDs.
Create Output File
Create the template on the main page of the Platforms tab:
|
Output File
If the output text file is opened the values should be:
- ==== Fixed marker locations in force platform space (MKS units) ====
- -0.313196 -0.267576 -0.025997 ORIGIN
- 0.236526 0.247737 -0.804424 X
- 0.186790 -0.264106 -0.027245 Y
