Sample files for this tutorial may be downloaded.
- 1) This tutorial will use the Static.c3d and Functional Hip.c3d files.
- 2) The Functional Knee.c3d file is used for the Functional Knee Tutorial.
- 3) FunctionalJoints_Hip_Knee.cmo contains a static trial with both the functional hip and knee defined.
The calculation of functional joints is described here.
Load Static Trial
|
1. From the Model menu, select Create -> Hybrid Model from C3D file.
2. A dialog titled Select the calibration file for the new model will appear;
- Select Static.c3d Click Open.
|

|
Create Functional Joint
|
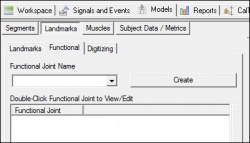
1. On the Landmarks tab:
- 1. Select the Functional tab
|
|
Create Right Functional Joint
|
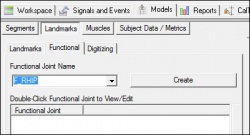
1. On the Landmarks tab:
- 1. Select the Functional tab
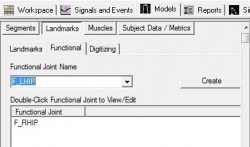
- 2. From the Functional Joint Name box, select F_RHIP.
- 3. Click Create.
|
|
|
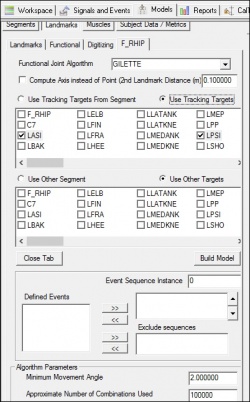
2. Select tracking targets for the F_RHIP:
|
Tracking Segment/Targets
Select Use Tracking Targets (ctrl-click to multi select)
LASI, LPSI, RASI, RPSI
Other Segment/Targets:
Select Use Other Targets (ctrl-click to multi select)
RTHI1, RTHI2, RTHI3, RTHI4
|
|
- Click on Close Tab before proceeding.
|
|
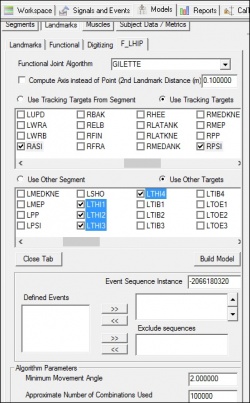
Create Left Functional Joint
|
1. On the Landmarks tab:
- 1. Select the Functional tab
- 2. From the Functional Joint Name box, select F_LHIP.
- 3. Click Create.
|
|
|
2. Select tracking targets for the F_LHIP:
|
Tracking Segment/Targets
Select Use Tracking Targets (ctrl-click to multi select)
LASI, LPSI, RASI, RPSI
Other Segment/Targets:
Select Use Other Targets (ctrl-click to multi select)
LTHI1, LTHI2, LTHI3, LTHI4
|
|
- Click on Close Tab before proceeding.
|
|
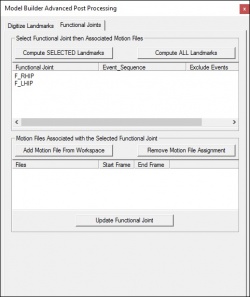
Model Builder Advanced Post Processing
|
1. Select the Post Processing button from the menu (image below)

2. Select the Functional Joints tab from the dialog box (image on right)
|
|
|
3. Open functional movement file:
- 1. Select the Add Motion File From Disk
- 2. Browse to functional movement file, select Functional Hip.c3d
- 3. Click Open
- 4. Select the motion file by clicking on the trial, this will highlight the trial in blue.
|
|
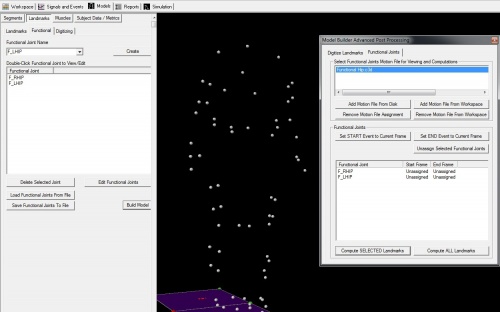
NOTE: Once the trial has been selected, the name of the trial will be highlighted and the movement file will appear in 3D viewer.
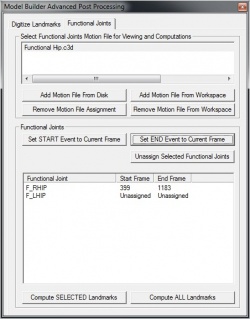
Define F_RHIP Start and End of motion
|
1. Select the START frame of the right functional movement
- 1. Select F_RHIP, this will highlight the joint in blue
- 2. Using the slider (seen below), select the START frame of the right functional movement. Set the Start Frame to 399

- 3. Click Set START Event to Current Frame
|
|
|
2. Select the END frame of the right functional movement
- 1. Select F_RHIP, this will highlight the joint in blue
- 2. Using the slider (seen below), select the END frame of the right functional movement. Set the End Frame to 1183

- 3. Click Set END Event to Current Frame
|
|
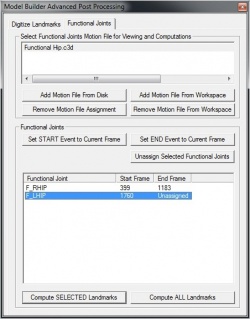
Define F_LHIP Start and End of motion
|
1. Select the START frame of the left functional movement
- 1. Select F_LHIP, this will highlight the joint in blue
- 2. Using the slider, select the START frame of the left functional movement. Set the Start Frame to 1760
- 3. Click Set START Event to Current Frame
|
|
|
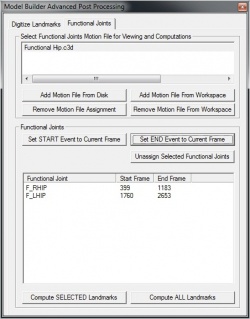
2. Select the END frame of the left functional movement
- 1. Select F_LHIP, this will highlight the joint in blue
- 2. Using the slider, select the END frame of the left functional movement. Set the End Frame to 2653
- 3. Click Set END Event to Current Frame
|
|
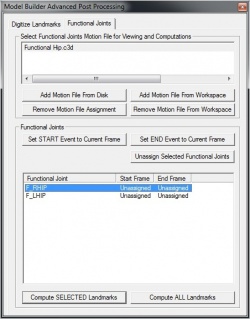
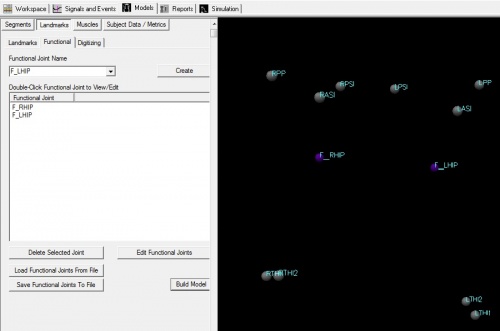
Compute Landmarks
|
1. Select Compute ALL Landmarks
2. Close the Model Builder Advanced Post Processing dialog box
3. The F_RHIP and F_LHIP landmarks should appear in purple in the 3D viewer
If the landmarks do NOT appear in the 3D viewer, check:
- That the landmarks are turned on (3D View Options)
- Check that all steps in this tutorial were completed
|
|


