Tutorial: Digitizing Pointer Post Processing
The objective for using a digitizing pointer is to identify anatomical landmarks without having to place motion capture markers at the location. For background information see here.
- Note that this functionality is not available in Visual3D Lite. We have not sold a copy of Visual3D Lite for many many years, so hopefully this won't adversely affect too many laboratories.
Download the example files to be used in this tutorial.
Data Collection
The first step in the process is to capture a standing trial. Note that the pointer must be in the scene, so that we can create a model for the pointer.
Before the files are brought into Visual3D, two C3D trials must be collected:
- The Static trial. During this trial -
- The subject must be stationary
- The subject must be markered up
- The pointer must appear in the trial
- The Pointer trial. During this trial -
- The subject should be relatively stationary
- The pointer should be moved around the volume and the tip of the pointer placed on the landmarks which the user would like to identify
- If a spring loaded pointer is used, the wand should be compressed when the tip is on the landmark which the user would like to identify. Visual3D will automatically identify when the pointer is compressed
- The pointer can be used to identify one landmark or multiple landmarks within a trial
NOTE: The target IDs should be consistent between the static and pointer trial
Step 1. Create a model
|
1. Load Static C3D file
|
|
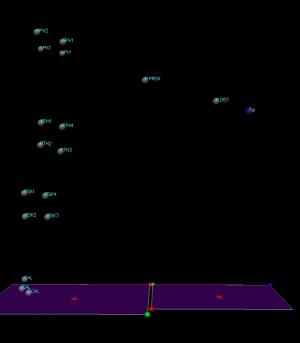
The 3D viewer should show a unilateral marker set with only tracking markers and the two markers on the pointer collected. In this file the pointer markers are labelled P.PROX and P.DIST Note: The pointer MUST be in the scene, so that we can create a model for the pointer. |
Step 2. Define Landmarks
|
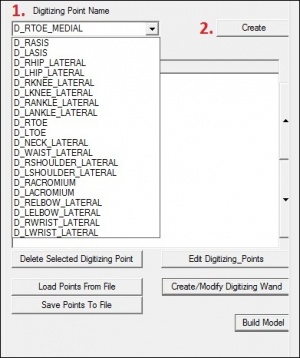
1. Go to the digitizing landmark
|
|
|
|
3. In the list box that appears select the 3 tracking markers associated with this landmark. 4. Click Close Tab |
5. Continue to add the following landmarks to the listbox:
- D_RTOE_LATERAL
- D_RANKLE_LATERAL
- D_RANKLE_MEDIAL
- D_RKNEE_MEDIAL
- D_RKNEE_LATERAL
- D_RASIS
- D_RILCR
- D_RTROCH
- D_LASIS
- D_LICR
- D_LPSIS
- D_LTROCH
- The tracking targets selected should not move relative to the "landmark" between the digitizing point trial and the static calibration trial. You can also load the previously defined digitizing landmarks to see an example. The instructions to do this are listed below (both a mdh and vpn file are included in the sample data files).
To load previously defined digitizing landmarks:
- If you already have a model template (mdh) with digitizing landmarks created, you can select Model -> Apply Model Template.
- This will load data from a MDH file. This is the recommended method to save the definition of digitizing landmarks
- If you already have a landmarks template file (vpn), you can select Load Points From File.
- This will load data from a VPN file. This is a legacy feature and it is recommended to save this information in the model template.
NOTE: Please note that if you are using a spring loaded pointer, the order in which you define the digitizing points, should reflect the order in which you will point to the landmarks in the digitizing trial
Step3.Create the digitizing wand
If you have already created the digitizing wand, this step may not be necessary. It doesn't, however, hurt to check the properties.
|
1. Define the wand:
|
|
2. View the pointer in the 3D viewer:
|
Step 4. Select the Model Builder Post Process icon on the Toolbar
|
1. Open the Post processing dialog |
|
2. In the post processing dialog:
|
3. Define the time in the trial when the pointer is identifying a landmark:
There are two ways that you can define the frame at which to capture the tip location:
Option 1:
- You can play the motion trial and stop the trial at the frame of data that you want. Select the Add Event at Current Frame button.
|
Option 2:
|
|
In order to see the landmarks you will need to close the Post Processing Modeling Tab, so that Visual3D makes the standing trial active in Model Builder Mode. These landmarks are now part of the model. If the model template is saved, these landmarks (and their definitions) will be saved in the model template file. These landmarks can be used to define the segments. |
NOTE: It's also possible to use the digitizing pointer in Real Time streaming mode, however, it's recommended to use the post processing to ensure you still have the data. An example of using the digitizing pointer from streaming data can be found here.


