Video
| Language: | English • français • italiano • português • español |
|---|
Visual3D does not process Video data. For example, it is not possible to identify locations manually by digitizing a series of Video images. Visual3D expects to receive data in the format of 3D points, ANALOG data, or 6 Degree of Freedom segments.
We are receiving an overwhelming number of requests for simple processing of Video images, so we are currently evaluating the idea.
We can certainly see the value in having simple 2D digitizing and analysis for use in teaching because this allows students to become acquainted with Visual3D before working in a laboratory. We welcome input from the community in identifying the basic requirements and cost of such an addition to Visual3D.
Playing Synchronized Video and MoCap animation
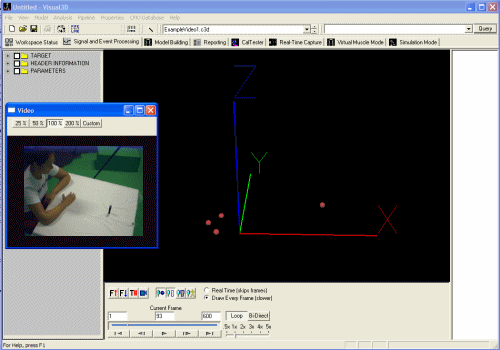
Visual3D will automatically play Motion Capture data and synchronized video.
For example, download a ExampleVideo1.c3d and synchronized video file ExampleVideo1.avi
You can load the AVI file two ways: (both methods are described below)
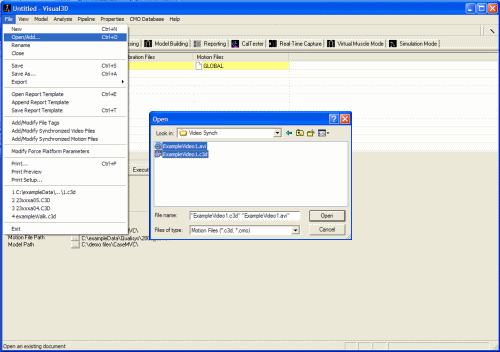
- File-> Open and selecting both files
- File -> Add/Modify Synchronized Video Files
Using File-> Open
|
|
Using Add/Modify Synchronized Video Files
- (A) Load the C3D files into Visual3D.
- (B) Go to File -> Add/Modify Synchronized Video Files
- (B) 1. In the dialog that appears, select the relevant C3D file. Then click "Associate Video File with Selected Motion File" and browse to the desired avi file.
Changing Video size
The size of the video window can change by clicking on one of these buttons: "25%", "50%", "100%", "200%", or enter in a custom value.
Export 3D Viewer Animation to AVI
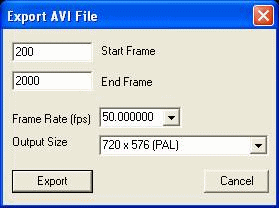
Visual3D can create/export video of the 3D viewer animation. To do export/create an AVI video file of the 3D viewer animation select Export from the File menu. Then select Export Animation to AVI. A dialog box will appear that will allow you to select the range of frames, frame rate, and size of the video.
Stuttering playback of avi files
A user identified an issue that we will use as an illustration of video export settings.
Question: When exporting/creating an AVI of an animation (target data captured @ 100 Hz) with the following settings, we get a stuttering playback (stops, starts, skips quite a few frames). Similar issues are seen at other Frame rates / output sizes. Is this a codec issue or a Visual3D software issue?
Answer: At 50 frames/second the AVI file is probably very large. The problem is usually with reading the file from the hard drive fast enough to animate it. Try 25 frames/second and see if that works any better (25 fps is close to the PAL format of 24fps). For just playing video, 25fps should be sufficient.
If you have any other software to convert video, you can also take the output AVI file and convert it to a compressed format, such as mpg, or windows media format.


