From Software Product Documentation
(diff) ← Older revision | Latest revision (diff) | Newer revision → (diff)
- The most common cause of missing bones is that the toggle button
 to display the bones in the 3D viewer has been toggled off.
- Find this button on your screen and press it to see if the bones reappear.
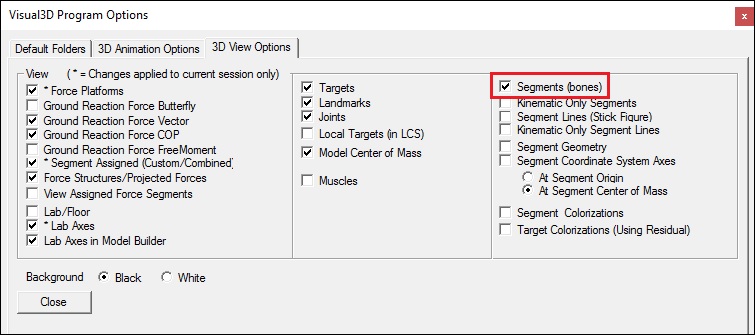
- You can also open the View menu and select Modify 3D Animation View Options. The Program Options dialog should open to the Visual3D 3D Animation Options(2) tab.
Note: The keyboard shortcut for this is Alt+V.
- On this tab verify that the Segments checkbox is checked. If not check it now.
- The 2nd possibility is that the object files that contain the wire frame models of the bones have been accidentally removed from your system
- Open Windows file explorer and navigate to C:\Program Files\Visual3D v3\Models.
- Verify that .obj and/or .v3g files appear in the folder.
Note: Depending on the version of software you have it could be either .obj and/or .v3g or a combination of the two.
- If the neither .obj and/or .v3g files appear in the folder you will have to re-install Visual3D.
- The 3rd possibility is that Visual3D is looking in the wrong place for the object files that contain the wire frame models of the bones.
- From the Properties menu select Program Options.
Note: The keyboard shortcut for this is Alt+O
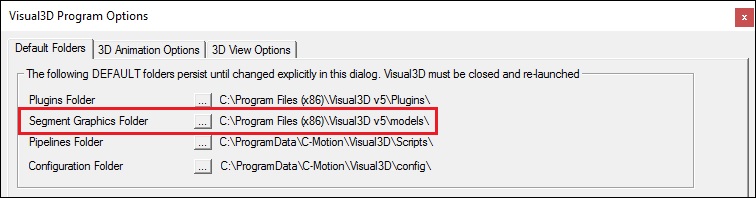
- Verify that the path is correct. If Visual3D was installed in the default directory, the path will be C:\Program Files\Visual3D v5\Models.
- If the path is incorrect, click the ellipses button
 next to the path labeled Segment Graphics Folder.
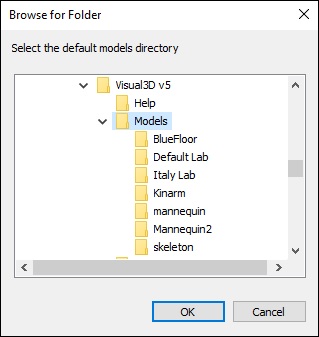
- From the Browse For Folder dialog box select C:\Program Files\Visual3D v5\Models and click OK.

.jpg)
.jpg)