Getting Started: Difference between revisions
(Replace C-Motion with HAS-Motion.) |
m (Text replacement - "www.c-motion.com/download" to "www.has-motion.com/download") |
||
| Line 17: | Line 17: | ||
=Summary= | =Summary= | ||
- Download samples [https://www. | - Download samples [https://www.has-motion.com/download/examples/Visual3DExample1.zip file] to verify Visual3D functions are all available. | ||
- The Workspace tab will show a model and 3 walking trials associated with it. | - The Workspace tab will show a model and 3 walking trials associated with it. | ||
| Line 37: | Line 37: | ||
==Workspace Options== | ==Workspace Options== | ||
#Download and unzip the sample data files [https://www. | #Download and unzip the sample data files [https://www.has-motion.com/download/examples/Visual3DExample1.zip Visual3DExample1]. | ||
#Launch Visual3D. | #Launch Visual3D. | ||
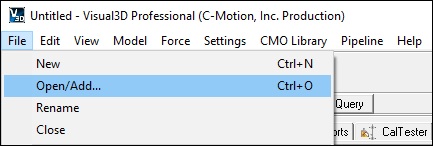
#From the <b>File menu</b>, choose <b>Open/Add…</b><br>[[File:FileMenuOpen.jpg|caption]]<br> | #From the <b>File menu</b>, choose <b>Open/Add…</b><br>[[File:FileMenuOpen.jpg|caption]]<br> | ||
Latest revision as of 11:20, 22 May 2024
| Language: | English • français • italiano • português • español |
|---|
The purpose of this section is simply to acquaint the new user with the user interface and the general process for processing motion capture data. For detailed information on using Visual3D, you can visit the Tutorials Section or the online documentation
A video of the old installation process can be found [here]. If you have license or activation problems, check out the trouble-shooting guide.
NOTE: Visual3D had substantial updates in early 2021 to handle the rotation matrices needed to automatically build models for markerless motion capture systems and again in late 2022 to handle multisubject C3D files. Customers whose Visual3D software support has lapsed will need to contact HAS-Motion to restart software support in order to access these features.
Visual3D Version Release Notes
Summary
- Download samples file to verify Visual3D functions are all available.
- The Workspace tab will show a model and 3 walking trials associated with it.
- Awareness of the Active Files combo box in the toolbar.
- Awareness of how to associate a motion file to a model.
- Signal and Events tree exploration.
- Reporting and printing reports.
- Setting defaults.
- Configuring views.
Using Visual3D
Workspace Options
- Download and unzip the sample data files Visual3DExample1.
- Launch Visual3D.
- From the File menu, choose Open/Add…
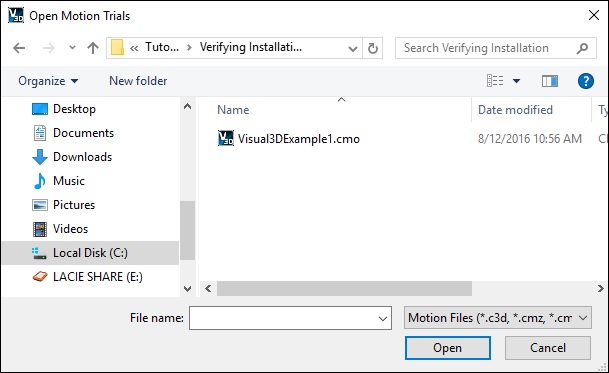
- Locate the file that you downloaded.
- Click the file name to select it and click Open.
- Visual3D will open to the Workspace tab and you will see 3 items highlighted in blue.


- Note that the CMO (or CMZ) file name is in the first column. Adding files to the workspace replaces the filename to avoid overwriting data.
- The three lines are highlighted together because the model and the motion files are already linked together (associated).
- If you select View->Long Filenames from the menu bar you will see where the files were located when input into Visual3D.
- Note the 2 combo boxes in the toolbar. The first is the Active Files selector. If you select a single file (or tagged group of files as described elsewhere) you will see the radio buttons in the Active column change. The second is a data query field for advanced users (documented elsewhere).
- Finally, note the Pipeline Processes box and Execute button. You can save commonly used pipelines (batch scripts) that you use in you pieplines data folder and they will always be listed here. Pipelines are .v3s files and the special location is listed in the Edit->Preferences dialog.


Animation, Signal and Event Options
- Above the workspace there are several tabs. Click the Signal and Event Processing tab.
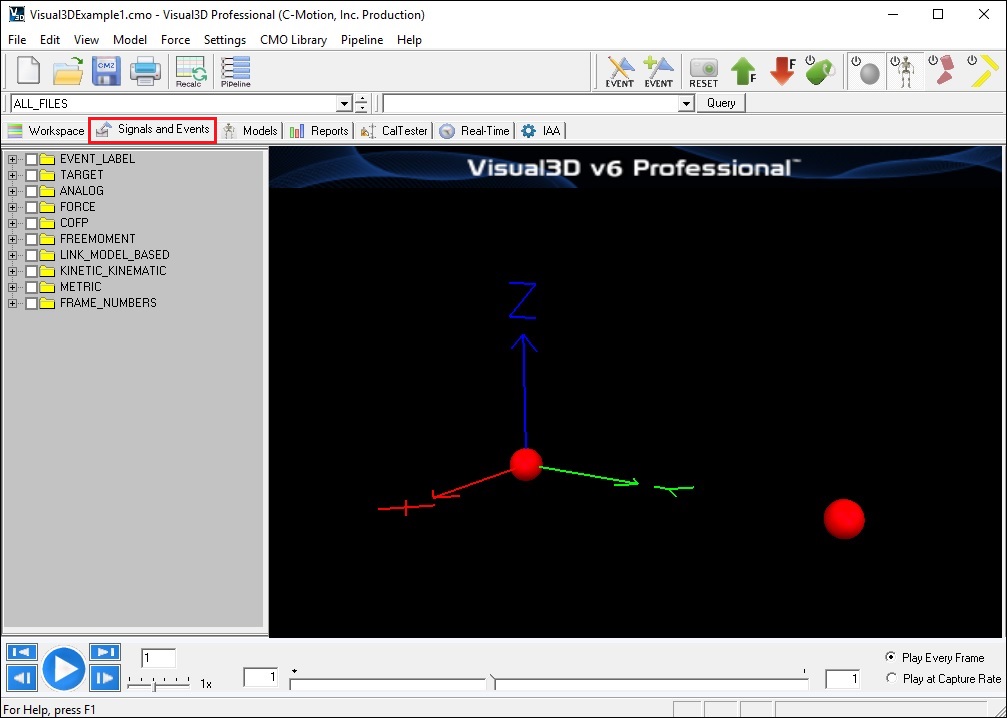
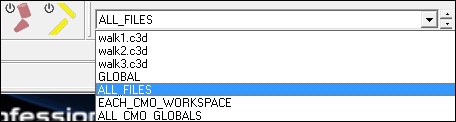
- At the top of your screen, locate the Active Files drop-down box with the default value of ALL_FILES. This is the combo menu and it indicates which of the files loaded into your workspace are currently active.
- Use the mouse to change the menu selection from ALL_FILES to Walking1.c3d.
- Click the Play button—the right-pointing triangle—in the video control panel at the bottom of the screen. You will then see the animated walking model, similar to the one in the following illustration. If you do not see the animated skeleton check the troubleshoot section below.
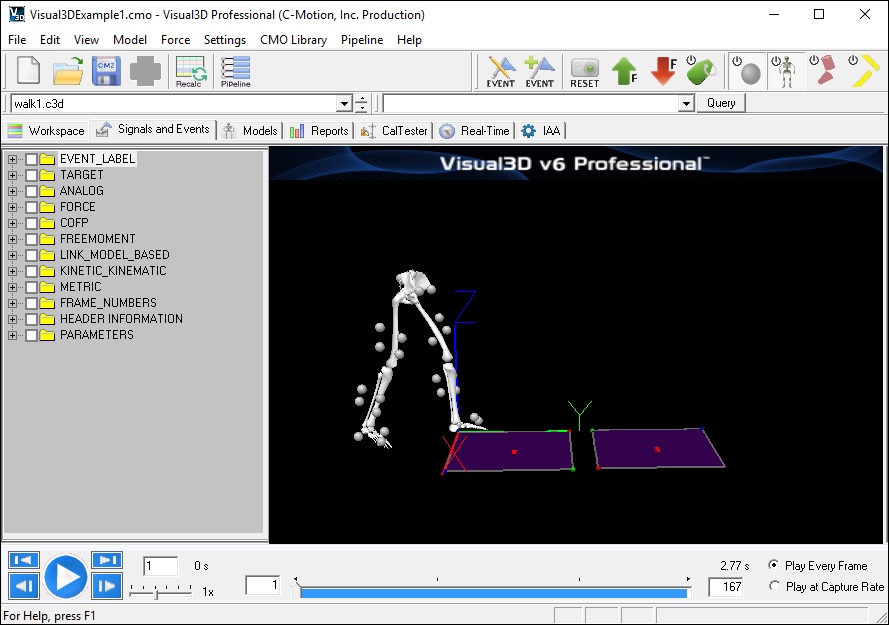
- Use the VCR control buttons and the view options to alter the view.
Note: The 3D animation viewer camera perspective is controlled using the mouse keys and mouse movements. The Visual3D tutorials describe how to control the camera angle along with many other helpful things. - Right-clicking in the viewer brings up more options.


- Explore the data tree in the left panel.
- - EVENT folder contains points of time of meaningful events. Events are created manually or with pipeline commands (mins, max, thresholhds, auto-gait, etc).
- - TARGET folder contains mocap marker information. The ORIGINAL subfolder is the raw data.
- - Select the TARGET->PROCESSED subfolder and click on any signal. The Quick Report dialog pops up showing data values and the Processing History. Select the Processing History tab and you will see that a lowpass filter was applied to the raw data to create this Processed data.
- - ANALOG folder is the raw force plate data
- - The other folders provide either quick calculations or C3D data as provided by the C3D specification (www.c3d.org)
Reporting and printing option
- Click the Pause button on the viewer.
- Click the Reporting tab to switch to the Visual3D Reporting Mode.
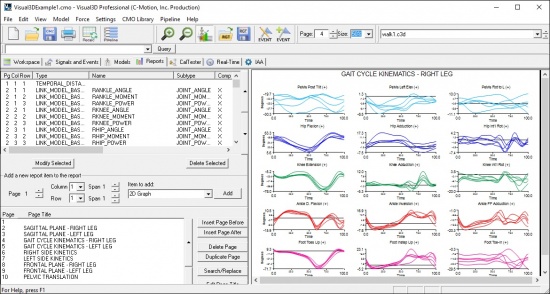
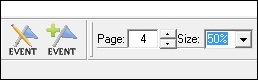
- In the upper right corner of your screen, just above the tabs, is the page-number and size control. Use this control to cycle through the various report pages.
- Report graphs are created by page, row, and column. Pages are listed in the bottom left section and can be selected.
- Report graph details can be accessed in the top left section by double-clicking on a graph's row entry.
- To print, click on the printer icon, or choose Print… from the File menu.
- If necessary, select a printer and click OK.


Associating CMZ files with Visual3D
The Visual3D installer should associate .cmz and .c3d files with Visual3D. However, if you want to change a setting:
In Win 7, 8, and 10 use the windows file explorer and find any CMZ file.
Then, right-click on it and select Properties.
Right on top is a Change button to set the association. In each dialog that follows scroll to the bottom to select "other" applications until eventually you will get a file open dialog. Go to: C:\Program Files\Visual3D x64\Visual3D.exe select that and all should work OK from then.
Setting Visual3D Default Folders
Visual3D pipeline commands can include default path names for folders. This allows the user to specify paths relative to a default path, which is convenient when a user modifies their data directories, or want to sent a pipeline to another folder that has a different default path.
Each installation of Visual3D (Production, Beta, etc) includes folders containing the animation model files, configuration files, etc. This can be confusing for the user should they modify or add a new model file, and then can find it available in one version of Visual3D and not the other. More critically, if the user modifies one of the default models, the next installation will overwrite the file. To combat any changes in the installation, users can specify a common path for all Visual3D versions that the Installer is not aware of.
Create a C:\VISUAL3D directory and copy all your Model, Plug-in, Pipeline, and Data directories there.
Select the "Preferences" option under the "Menu" Item.
Default Folders
Select the "Default Folders" tab set the defaults to the new locations.
Subsequent Visual3D updates will not change these new locations, so be careful if C-Motion releases new model graphics - meaning that you many need to copy any new graphic files to your own models directory (note that this is very rare).
This dialog is divided into folders that are constant unless changed by the user explicitly (top two groups), and those folders that are dynamic and changed by Visual3D as the user selects files (e.g. Visual3D attempts to remember the last path selected).

Persistent Paths
Default folders for Visual3D
| Plugins Folder | Visual3D searches this folder for Visual3D Plugins. These plugins may be processing plugins that will appear in the list of Pipeline commands, or they may be Real_Time plugins that will appear in the options for Real-Time Streaming |
| Segment Graphics Folder | The animation models associated with the model segments are stored in. If no path to an object file is selected in the Segment Properties dialog, Visual3D searches hear for the file. |
| Pipelines Folder | Default folder for Pipelines. Used mainly for the Pipeline Favorites. The pipeline commands may refer to the default pipeline folder as VISUAL3D_DEFAULT_PIPELINE_FOLDER |
Default folders for data and templates
| Default Data Folder | The pipeline commands may refer to the default data folder as VISUAL3D_DEFAULT_DATA_FOLDER |
| Default Report Template Folder | The pipeline commands may refer to the default report template folder as VISUAL3D_DEFAULT_REPORT_FOLDER |
| Default Model Folder | The pipeline commands may refer to the default model template folder as VISUAL3D_DEFAULT_MODEL_FOLDER |
A typical way to define the default folders for use in a pipeline is Set_Pipeline_Parameter_To_Folder_Path
Transient Paths
| Report Template Folder | Current default FOLDER for the report template. Reset every time a Report Template is opened. |
| Model Folder | Current default FOLDER for the standing trial. Reset every time a Hybrid Model is created. |
| Motion File Folder | Current default FOLDER for the motion trial. Reset every time a movement file is opened. |
Uninstalling Visual3D
Please do Help->Deactivate to free up the license before uninstalling.
- To uninstall Visual3D, you can either use the uninstall utility in the Programs group or use the Windows add/remove programs control panel.
- You can download updates and newer versions ”on top of” your previous installation without uninstalling or deactivating a license.